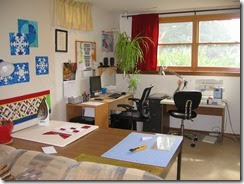
 My sewing room is nice and tidy today. I thought tutorial pictures might be less confusing with no unrelated bits getting into the pictures. Also, having you all here for the sew along seems like having company, and Mom taught me to tidy up for company. I didn’t vacuum though, sorry! I figure you all want to get sewing as well and probably understand.
In today’s tutorial I’ll share how I print my foundations on freezer paper, how I prepare the foundations, organize my fabric and finally sew everything together. I’ll be using the Snowflake 1 templates and making version 2 of the snowflake.
Printing freezer paper foundations
You can trace the foundations onto freezer paper, or you can print them directly onto the paper if you have an inkjet printer. (I’ve read it isn’t a good idea with a laser printer.) I cut a piece of freezer paper to 8 1/2” x 11, the size of the regular paper I usually feed through the printer. It does curl, and the printer doesn’t always get a good grip on the waxy surface to feed the paper through, so it needs a little help.

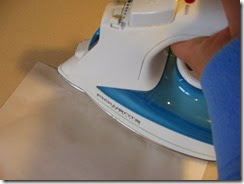
I place the freezer paper shiny side down on a scrap page of 8 1/2” x 11 paper. I iron a little sliver (between 1/4” and 1/2”) at the top edge of the page. The freezer paper will stick to the scrap paper at that edge.
Now I can feed this through the printer, with the ironed edge going first, and the matte side of the freezer paper on the printing side. (That’s face up for my printer, but check yours to be sure). I only stack one of these at a time in the printer’s paper tray, so I print only one copy of the template page at a time.
Preparing the foundations
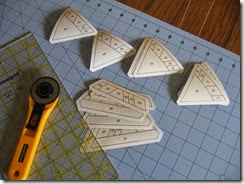
Once I have printed the foundation on the freezer paper, I use my rotary cutter and ruler to cut them out.
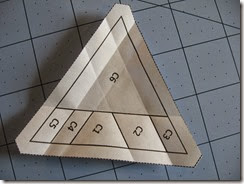
The next step may seem like busy work, but I have found it really does help later when I have to fold the paper back as I sew. This will make more sense when I describe that step. For now, just trust me. I fold the paper along all the seam lines between patches to crease it. Extend the crease of each line all the way to the edges of the foundation.
Organizing my fabric
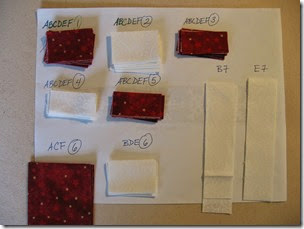
Using the tables in the pattern, I cut fabric to sizes that will cover the various patches and a 1/4” seam allowance around them. For example, according to the cutting table in the pattern tells me that a blue 1 3/8” x 2” rectangles will be large enough to cover patch A1 (or B1, C1, D1, E1, F1). I’ll need a total 12 of this size to finish the whole block.
Altogether, there will be 83 pieces in this snowflake. Don’t run away! It isn’t as scary as it sounds! When I lay them out by size and colour on a labeled sheet of paper they are much less intimidating. For each size/color, I list all the corresponding patches that use that size and colour.
Finally sewing

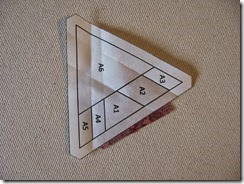
Well, almost sewing. First I am going to press the first piece of fabric to the foundation with a hot iron, right over the patch labeled “A1”. The fabric should be right side up, with the wrong side down against the shiny side of the foundation, covering the whole patch and 1/4” around it. I press with just the tip of my iron, trying not to set the faceplate on any bare bits of the freezer paper. I don’t want melted wax (or whatever that shiny coating is) on my iron. One of those tiny applique irons would probably work really well for this step, but I don’t have one.
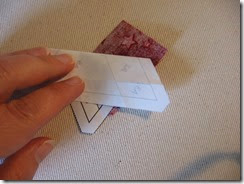
Next, I fold the paper back along the line between patches A1 and A2, right where I creased the paper earlier. I have to gently pull the paper away from the fabric if I ironed outside the line, which happens most of the time. As I pull on the paper, it stops at the crease. The fabric is still attached to the paper over patch A1.
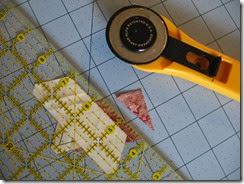
Now I use my rotary cutter and ruler to trim excess fabric1/4” away from the folded paper. This trimmed edge will be what I line up with the next bit of fabric.
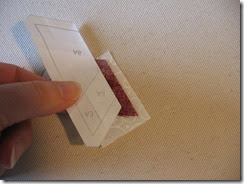
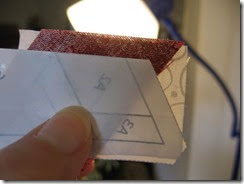
Next I place the foundation with fabric attached over the fabric for patch A2 making sure right sides of fabrics are facing each other (this seems like no-brainer but don’t look too closely at some of my blocks!). Holding the whole thing up to a light or window helps me see the outlines of A2 and the fabric I’m adding, so I can make sure the fabric is positioned to cover all of A2. If all of A2 is at least 1/4” inside the fabric, everything is good to go and NOW I can go to the sewing machine. Otherwise I reposition the fabric until it’s where it needs to be.
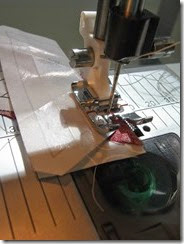
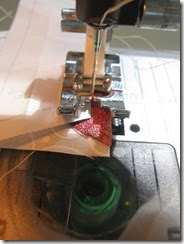
Keeping the paper foundation folded back, I sew just beside the fold, as close as I can go without catching the paper in the seam. Before I first tried this, I thought it would be difficult to stitch just beside the seam, but it really wasn’t. I’m glad I gave it a go.
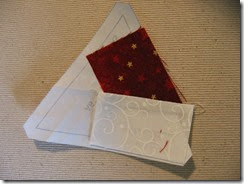
Back at the ironing board, I unfold the paper and press things flat. The fabric over A2 will now also Adhere to the foundation.
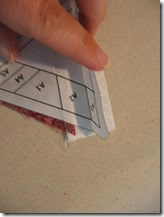
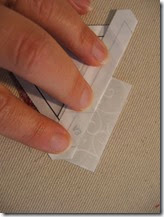
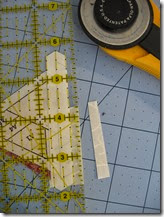
It’s time to carefully fold the paper along the line between A2 and A3 and trim the excess fabric 1/4” away from the folded edge of the paper.
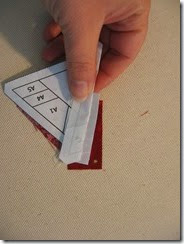
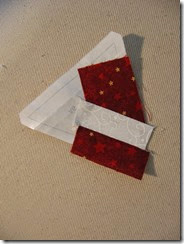
I position the whole thing over the next piece of fabric, checking that the fabric covers A3 plus 1/4” around it. Keeping the paper folded I head back to the sewing machine and sew close to the fold again. Above on the right you see what things look like after I unfold and press.
So the routine is: fold paper at the next seam line, trim away excess fabric 1/4” away from the fold, position next piece of fabric, sew next to folded paper, open and press, repeat. Add the patches in order: A1, A2, A3, A4, A5, A6.
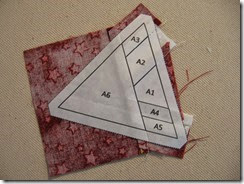
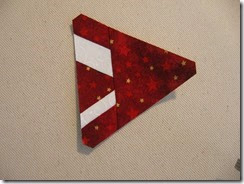
Here’s the back of section A after all the fabrics are added, and what the section looks like on the good side after I have trimmed around the paper. You can see I could have used a slightly smaller piece of fabric for A6 but what I have works. A bigger piece is OK, but if a patch is too very close to minimum size it’s trickier to position and to be sure it has all the proper seam allowances covered. You’ll figure out how small you’re comfortable with.
I’ll repeat this for all the sections in the pattern.
Streamlining the process
This seems like a lot of starting and stopping. Here’s what I do to streamline the process a bit. I get all the foundations and all the fabrics cut first, then I tackle each step in assembly-line fashion. I iron the first patch of each section onto its foundation. I fold and trim each of them, then go to the sewing machine for some chain sewing, sewing the seam on all them, then press all of them and repeat the steps to add the next patch to each section. Having the fabric organized on the labeled sheet of paper really helps me keep track of what fabric to use where.
Assembling the sections

Here are all my finished sections, ready to put together into a snowflake. I assemble them in the order given in the pattern: join A to B, join C to D, join E to F, being careful not to stretch anything. I'll gently remove the freezer paper before sewing sections together.

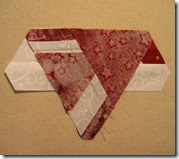
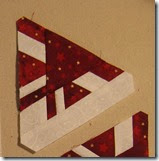
This is where those shaped seam allowances at the points come in handy. You can see in the middle picture above that the trimmed points on A line up perfectly with the sides of B. No guesswork!
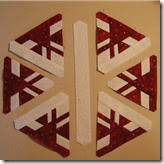
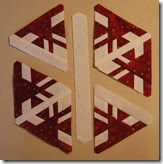
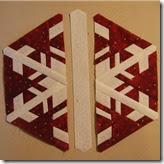
Then I join AB to CD, then ABCD to EF to make 2 snowflake halves.
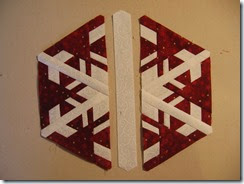
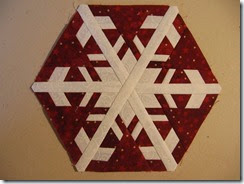
After sewing one snowflake half to each side of the shaped strip G I have a snowflake! Again, the trimmed points lined help me match up the halves with the points on the strip.
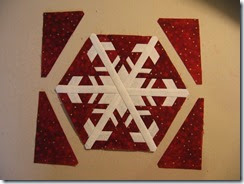
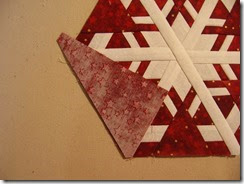
To turn this into a square block I need to add triangles H and G. Because no matter how careful I am my blocks often end up with slightly wonky sides, or just a hair undersized, I have chosen to use the oversized triangle option from the pattern and then trim the block to size.
Just a side note, here’s how I trim the triangle points using the templates:
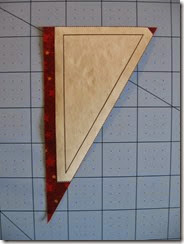
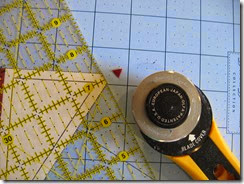
I place the template over the triangle, tucking up into the point I want to trim until both sides of the triangle template are flush with the sides of the fabric triangle. Then I use my ruler and rotary cutter to slice of the protruding point off the fabric triangle. Done! You might like to print the template on freezer paper and iron it to the fabric triangle to help it stay put while you fuss with the ruler.
Now back to making this block a square.
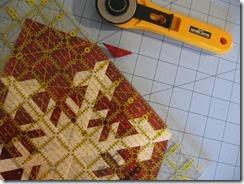

I trim off the little triangle tail, in line with he side of the snowflake hexagon, then continue adding the other 3 triangles in the same way.
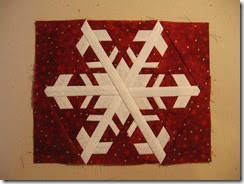
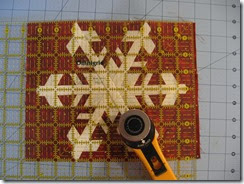
At this point I measure the block and trim the block to 9 1/2” wide, trimming from both sides to keep the snowflake centered.

Now I add my 1 1/4” x 9 1/2” strip to the top and bottom and trim the block to 9 1/2” square, so that it will be a tidy 9” finished when it’s sewn into a project. Ta da! All done.
As I’ve said elsewhere, you can use any paper-piecing method you would like for these snowflakes. This is the one I prefer, but something else might work better for you. Whichever method you choose, go sew! I’m looking forward to seeing your faux-frosty creations next Monday!
*************************************

Linking up with Linky Tuesday and Let's Be Social

thank you... now i am running off to my sewing room.
ReplyDeleteYour pictures and explains are great. I could see myself using this method of piecing.
ReplyDeleteGreat tutorial. I might try that method tomorrow when I finally get to make a snowflake..... I'll be thinking of colors all night long =).
ReplyDeleteWow, great tut. The block is beautiful
ReplyDeleteI do love your snowflakes, but my brain is fried after quilting for days on my Underground Railroad! I'm just going to enjoy watching all of you who follow these great tutorials. Wish I had the courage and time to get involved. It's going to be fun for sure! ---"Love"
ReplyDeleteThanks much for the great tutorial! I have seen this done before, but after reading your tutorial, I think I might actually try it. I plan to save your snowflake patterns for now as I'm under water here, but I want to try this PP method on my Dear Jane blocks - when I get some time to work on it. These snowflake blocks are wonderful! Congratulations for a great pattern!!!
ReplyDeleteI have never done paper piecing before but I feel very confident that I can make one of your snowflakes after watching your tutorial. Now it's off to the store to find some fabric!
ReplyDelete:)
DeleteI can't wait to get started! I purchased special fabric for this fun adventure too. :)
ReplyDeleteConcern is that the 1" square measures 1/8" smaller all the way around for me. I print actual size too. Just don't want my snowflake to be too small. Suggestions?
Are you printing form an iPad? Someone in the Facebook Snowalong group said that they are notorious for printing 1/8" smaller. If so, do you have access to a computer? Otherwise, you can try photocopying, enlarging by 114%, or try scaling on your printer. I hope that helps!
DeleteThx! It was from my laptop but I think if I change to my other printer, I can mess with the %. HAPPY SEWING
DeleteI've never used freezer paper for a foundation, but I'm definitely going to give it a try.
ReplyDeleteWhat a great tutorial! You make it look easy. I am saving all this info for when I have some time to relax and enjoy sewing!
ReplyDeleteSuch a pretty block! I like how detailed you made the tutorial. Thanks for sharing it.
ReplyDeleteThis is a fabulous tutorial, Joanne! And your festive snowflakes are beautiful!!!!
ReplyDeleteThis is a brilliant technique. Thank you for sharing it! I can't wait to try this out.
ReplyDeleteBeautiful snowflakes, and beautifully demonstrated! Thank you for sharing.
ReplyDelete