Saturday, January 19, 2013

Taming the scraps (part 1)

IMG_6455

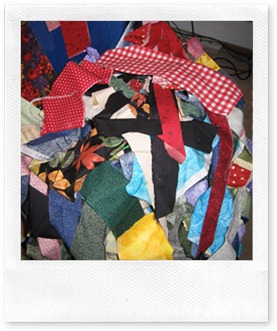
Almost two years ago I resolved to cut my scraps into usable precut pieces, “à la Quiltville”.  I spent days cutting, got discouraged, then decided I would just cut down some of the unruly pile every time I had my rotary cutter out, and would always cut new scraps down right away as part of the cutting for any new quilt.  That way, in a couple of years I’d have a box of tidy scraps to make a scrap quilt.  Fast forward…

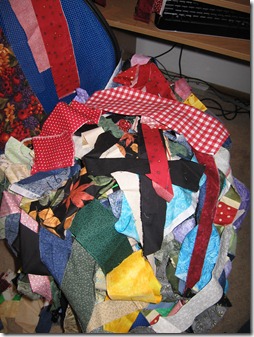
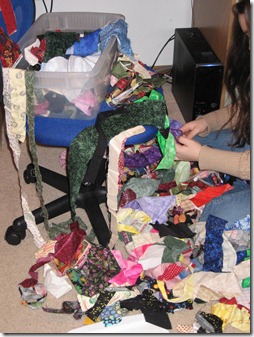
Are you laughing really loudly yet?  The mess you see at the left shows you how well I stuck to that plan!

Pulling strips of scrap fabrics to start working on my small lone stars made me realize just how much fabric is sitting, forgotten, in my two scrap bins.  I am inspired and determined (again).  I will tame this pile and not let it get out of hand again.
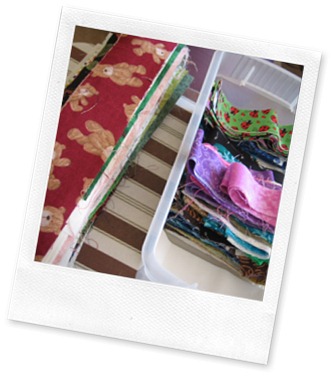
IMG_6510Yesterday I dumped out the wrinkled mass of strips and pressed every one of them.  This week they are getting trimmed down!  The stack of strips is about 4 inches high.  The strips in the box are the ones that I trimmed back in February 2011.

The other bin of scraps is less overwhelming, and I plan to get its contents trimmed down into tidy bits next week.  You can see below how many nice bits I had when I stopped a couple of years ago.  Not much has been used up from this bin.  The bin on the left should fill up as the one on the left empties outIMG_6509.
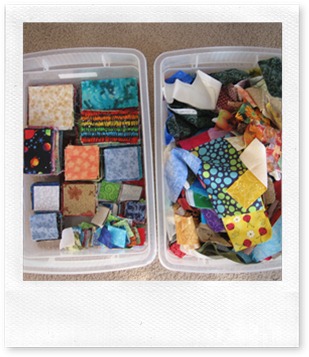
If all goes well (in other words if I don’t give up or get side tracked) I will have no unruly scraps left by the end of January.  At that point I will have two new challenges:  1) remember to trim any new scraps right away rather than starting a new pile of messy ones and 2) actually use the trimmed scraps in a quilt! 

I suspect the second challenge will be the greater of the two.  I can stick to the first by repurposing the scrap bins so that I don’t have an empty bin to toss a mess into, but actually making a scrappy quilt with such disparate fabrics will make this matchy-matchy quilter step out of her comfort zone! I keep telling myself that’s a good thing…

Sunday, January 13, 2013

Basting …ugh

I have said this before.  Basting is definitely my least favourite part of making a quilt.  The simple basting frame I made last year has helped, but I still drag my feet about getting around to the task.  For the past couple of weeks I’ve been wanting to curl up on the couch in  the evening with some hand project, but didn’t have a quilt basted ready to quilt or any yarn to knit with.  The itch to work on something finally built up enough momentum to carry me past my dislike of basting.

basting 2013-01-11

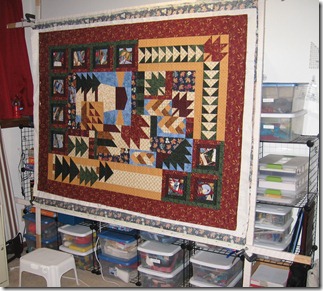
Here’s the Canada Quilt on the basting frame.  I did a much better job putting the frame together nice and square and the right size for the quilt than I did with the two other quilts I have basted on this frame.  A tape measure and a carpenter’s square and taking my time helped.  Taking the time to do that carefully made loading the quilt much easier, so I won’t dread that as much next time.  However, the actual basting was still deadly dull so I guarantee I’ll still have basting inertia to overcome for the next quilt!

However, now that I’ve gotten past the dull part, I can happily sit in the evenings and do this:

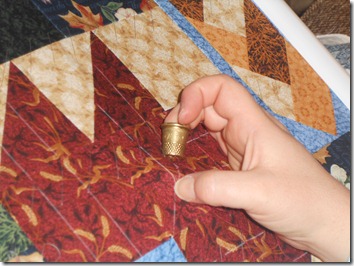
DSCN1131

You can’t see the needle in the picture, but it’s there!  I predict that about halfway through this quilt my husband will hear me question my sanity. What I was thinking when I planned the quilting?  I’m quilting no more than 1.5 inches apart (less in some parts) and though it seems like a marvelous idea right now and I’m liking how it’s turning out, I’m sure about halfway through I’ll just be wanting it to be done and wonder why I thought this was such a good idea.  Of course by then I’ll be committed to the original plan and have to stick it out!

Monday, January 7, 2013

Small Lone Star Block Tutorial

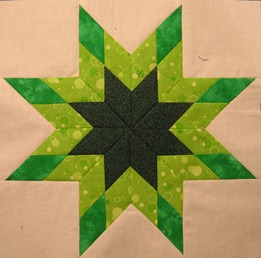
When I pieced another small Lone Star block yesterday I took pictures to share how to construct it. 
 
IMG_6496Materials:
1 strip dark green (1.5” x 20”)
1 strip medium green (1.5” x 20”)
2 strips light green (1.5” x 20”)
4 white squares (3-3/8”)
1 white square (5.25”) cut diagonally twice into 4 quarter square triangles.

Sew 1/4 seams for all seams.


Strip sets and sub-cut units

1.  Sew a light green strip and a medium green strip together along a long side.  This finished strip set should be 2.5” wide.

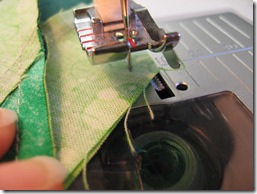
 (Oops. I forgot to take pictures of theses steps, so I had to sew up another strip set after the fact to demonstrate.  Pretend that leafy print is light green!)

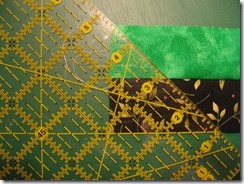
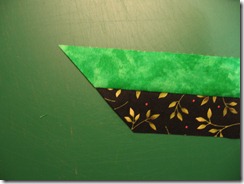
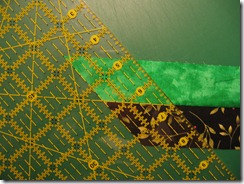
2. Lining up the 45 degree line on your quilting ruler with the bottom edge of the strip set, cut the end of the strip set at a 45 degree angle.

IMG_6499
IMG_6500

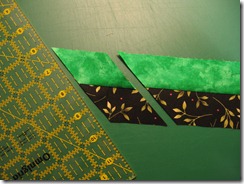
3. Line up the 1.5” line on your ruler with the cut end of the strip to cut one unit. Repeat to make a total of 8 units.


IMG_6501
IMG_6502


4.  Repeat steps 1 to 3 with a light green and a dark green strip.

Sewing units into diamonds

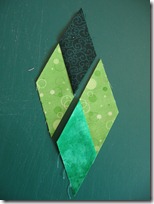
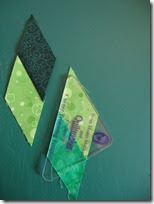
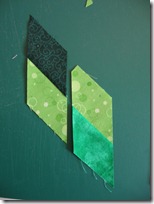
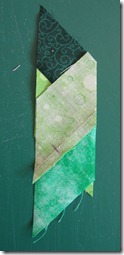
1.  Pair your light/dark and light units as shown above.  If you have a corner trimming template, trim one point as shown in the 2nd and 3rd photo below.  This will help you line up your two units to sew them into a diamond.

IMG_6463
IMG_6464
IMG_6466

See below how that trimmed point on the top unit lines up nicely with the angled edge on the bottom unit?  If you don’t have a corner trimmer, just make sure the upper point on the top unit sticks out the same amount as the lower point of the bottom unit.

IMG_6467


IMG_6472


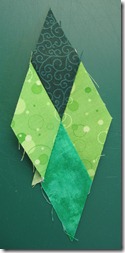
2.  Sew along the right edge. You should now have a diamond as you see on the right.

3.  Repeat 7 more times to make a total of 8 diamonds.


Marking the points

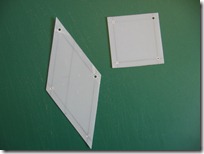
To sew the diamonds to each other and to the setting pieces, you will need to sew set-in seams (AKA Y-seams).  To do this, it's helpful to mark a dot at each point where seam allowances intersect on the 4 corners of the diamond as well as at all corners on the white background squares and quarter-square triangles.  An article at www.quiltingborad.com/resources/article-63.htm suggested using templates to quickly find where to place the dots.  If you are making several blocks, taking time to make templates will be time well-spent!  I made mine out of template plastic, but stiff card would work as well.

1.  Draw and cut out a 45 degree diamond shape.  The size doesn’t matter, as long as the angles are correct (sharp corners are 45 degrees, wide corners are 135 degrees). 

2.  Draw lines 1/4” from all sides.  Punch holes where these lines intersect.  Make another template in a square shape the same way.

IMG_6468


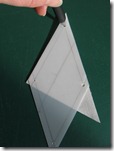
3.  Line up each angle of the diamond with the corresponding angle on the template and mark a dot through the punched hole.  You can use the 45 degree angle of the diamond template to mark the 45 degree point of the background triangles.  

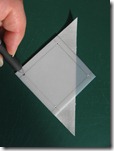
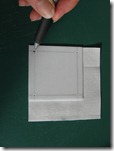
4.  Use the square template to mark the corners of the background squares as well as the 90 degree angle on the triangles.

IMG_6469IMG_6504IMG_6503IMG_6505


Joining diamond units

1.  Sew two pieced diamonds together, matching points.  Start the seam at the tip of the diamond that will be at the center of the star (in this case the dark green tip). Stop sewing at the dot you marked on the wide angle (light green).  Backstitch 3 or 4 stitches to lock the seam. You now have a V-shaped unit.

IMG_6474IMG_6475

2.  Repeat step 1 three more times to make a total of 4 V-shaped units.

Setting in background triangles

IMG_6491

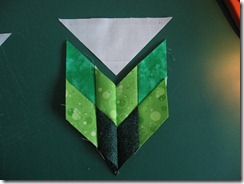
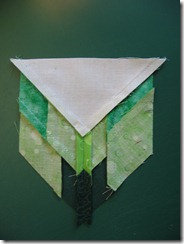
1. Match the marked dot on the medium green point of one diamond with the dot on the 45 degree angle of the white background triangle.  Pin.

2.  Match the marked dot on the triangle’s square angle with the dot on the diamond’s wide angle.  This should be where you stopped sewing the seam joining the two diamonds. Pin.

IMG_6476
Steps 1 and 2

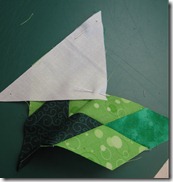
3.  Sew from the outside point towards the center, stopping at the marked dot and backstitching to lock the seam.  Be sure that the other diamond shape does not get caught up in the seam.

IMG_6477


4. Pin the other side of the triangle to the adjacent diamond unit.  

IMG_6478

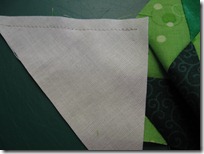
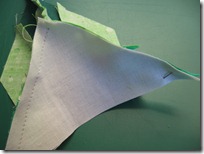
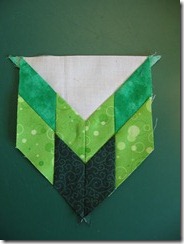
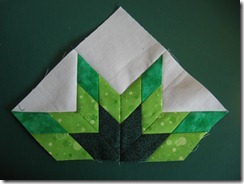
5.  Sew from the outside point towards the center, stopping where the seam meets the previous seam.  Backstitch.  Press the seam between the diamonds open to reduce bulk and help the unit lie flat.  Also press away from the triangle towards the diamonds.

IMG_6483
Step 5 back view

IMG_6482
Step 5 front view


6. Repeat  with the remaining V-shaped units to make a total of 4 quarter star units.

Final Assembly

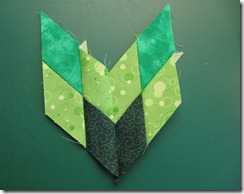
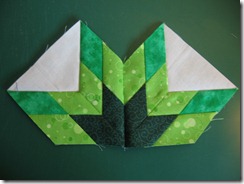
1.  Sew two quarter star units together as shown, again matching dots.  Sew from the dark green points towards the light green, stopping and backstitching at the marked dot on the light green. You now have a half-star.  Repeat.

IMG_6487
Make 2

2.  Set in a background square as shown, setting in the seams as you did with the background triangles when you made the quarter star units.  Press the center seam open to reduce bulk, and press the square towards the green. Repeat with the second half-star.

IMG_6490

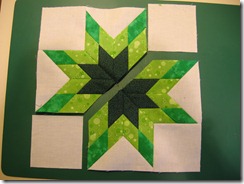
3.  Sew the two half star together as shown, matching marked points on the light green points and matching seams at the center.  Sew only between the marked points and take a few backstitches at the beginning and end of the seam.  Press the seam open.

IMG_6493

IMG_6494


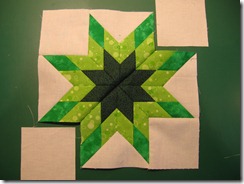
4.  Insert the last two background squares, setting in the seams as you did before.  Press towards the star.


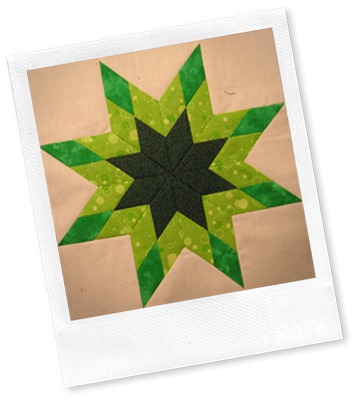
You’re done!  The block finishes at 9-5/8 inches square.
If you prefer a totally scrappy look like the block I posted about here you can cut units from a variety of strip sets instead of just two colour coordinated ones, but the construction will be the same.
Enjoy!


IMG_6496


Note: The lone star is a very traditional block, and can be made in a variety of sizes, with many more smaller diamonds per large diamond. I was inspired to use this size for a table runner by the quilt “Sowing Seeds” by Catherine Kypta in the May/June 2008 issue of Fons and Porter’s Love of Quilting magazine. I am using the same block size but I chose to use fewer fabrics in each star.

UPDATE:   Look here to see what I made with my lonestar blocks!

Thursday, January 3, 2013

Remembering how it works

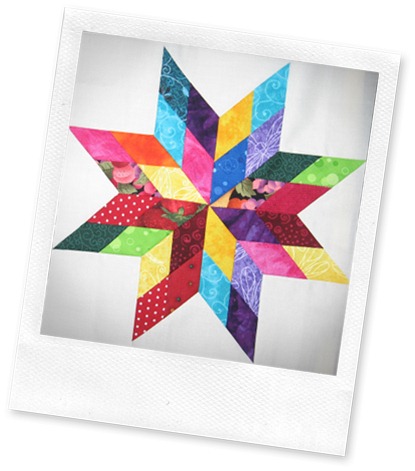
When I cut units for my new project, I cut enough extra to make a practice block.  I think it was good idea. I spent several hours today reviewing how to sew set-in seams and now I just about have the hang of it. The next blocks shouldn’t take as long to make (I hope).  As a bonus, I have a fun scrappy bonus block.

IMG_6459

After finishing this block I toyed with the idea of mixing up all my prepared units to make all the blocks scrappy, but I chickened out. The blocks for the runner I’m planning will be much more matchy-matchy, most with only three fabrics.   The exuberant block above will become a little wall quilt though.  I have a small bit of wall that is just calling out for it.

Wednesday, January 2, 2013

New Year, New Project

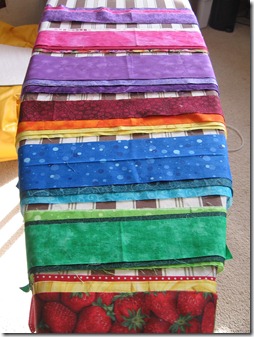
On New Year’s Eve before heading out to a friend’s house to see out the old year and ring in the new, my daughter and I pulled fabrics for a project to kick off 2013.  Inspired by Katie, who intends to make a serious scrap busting effort this year, we dove into the scrap strips bin that up until now has had fabric put in but not taken out.

We started with this…

IMG_6455IMG_6453

                                                  …which of course spilled out further as we rummaged.

In the end we pulled these:

IMG_6457

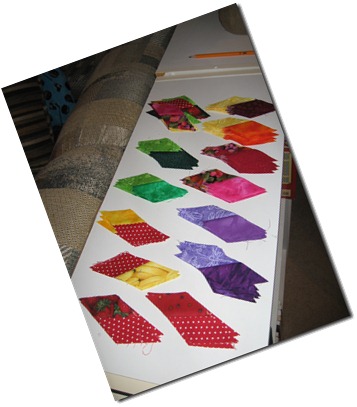
Today I trimmed all the strips down to 1.5 inches wide, sewed pairs of them together and cut the strips into units.

IMG_6459

Tomorrow I will pull out and cut some neutral fabrics for the background, then I’ll take a deep breath and tackle y-seams again.  I haven’t tried any since May 17, 2011.  Those turned out well but took me hours.  I’ll see if doing a whole stack at once improves my technique and speeds things up a bit.  The plan was for this first project of 2013 to provide a quick first finish.  I’ll let you know how that goes!

I hope 2013 is off to a good start, quilty and otherwise, for all of you!