
The mice were on my side though and provided me with a reason to sew some stockings. When I spoke with my mom on Monday, she told me that mice had gotten into her bin of Christmas decorations and among other messiness had shredded the Christmas stockings. They weren't stockings with sentimental value, so I think it's OK I had a skip in my step on the way down to the sewing room on Tuesday to make these:
 |
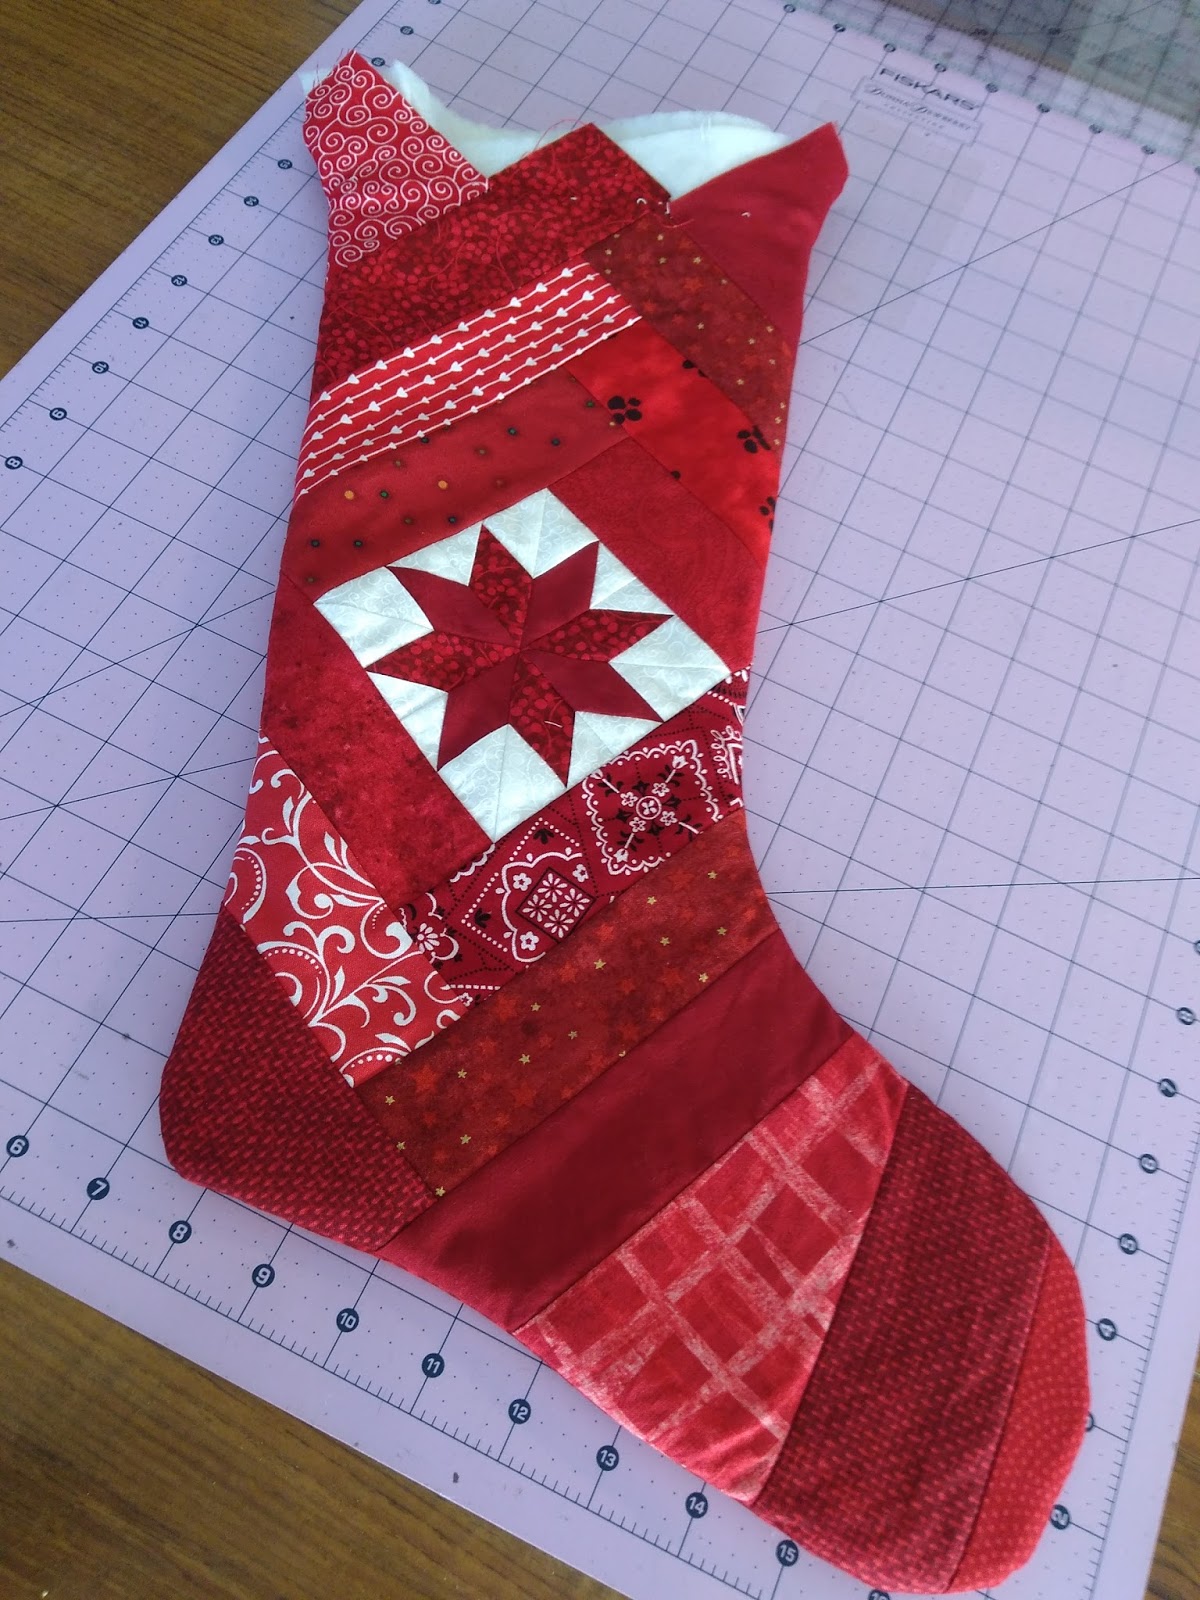
| Quilt as you go, twice turned Christmas Stockings |
I made the star with my Rapid Fire Lemoyne Star ruler by Deb Tucker of Studio 180 Design. I think I'm a little bit addicted to these blocks. Where else can I use them? A 4" block with no trouble at all! Now I want to try a 3" one. Maybe I need a few new ornaments for the tree.
At work at the Quilting Connection last month I learned a new technique for making quick, easy, lined stockings. I loved that I didn't have to cut individual stocking shapes from print fabric, lining and batting before sewing. We used pretty Christmas prints, no patchwork piecing, so it was a very quick project. For mom and dad's stocking I wanted some piecing, so I pieced a panel to use for one of the fabric pieces. Read on for more details.
This tutorial describes how to make a stocking with the twice-turned method. It shows you how to make it with with a single print fabric, or with a pieced panel built around any 4" finished block of your choice. It does not include a block pattern for the 4" block I used.
Materials :
Materials for optional pieced panel
(Skip ahead to the next section, Stocking body assembly, if you are using a print instead of a pieced panel for the front of your stocking.)
Step 1: Trace the template on a piece of Thermore. Make sure you use a marker dark enough to show through on the other side of the Thermore as well.
Step 2: Place your block or 4 1/2" fussy cut square right side up on the batting, positioning where you would like to see it in the stocking shape.
(It turns out I didn't take enough pictures of this part as I made my stocking, so I just made a rough start on a mini stocking too illustrate. Pretend the white square is actually a star block!)

Step 3: Choose a scrap strip that is long enough to extend along one full side of your block and past it, overlapping the drawn line of the stocking shape. Place the strip right side down on the block, matching one end with one side of the block and one side with a side of the block. The strip should extend past the block, over the stocking outline. Sew the strip down with a 1/4" seam. Fold the strip back, out of the way of the square, and press. You now have a strip sewn to one side of the block.
Step 4: Add a second strip to another side in the same way, ensuring that it covers the end of the first strip, runs along the side of the block and extends past the stocking outline.

Step 5: Continue adding strips in this way, always ensuring the strips extend past the stocking outline.

Step 6: Continue adding strips in this way until the entire stocking shape is filled. Here's what mine looked like. I added the strips near the toe at an angle, but you can add them however you like, as long as any seam allowances inside the stocking outline end up covered. Notice that the stocking outline is completely covered as well.

Here's what it looks like from the back.

Next comes the stocking assembly If you skipped the pieced panel and are using a print fabric instead, this is where you should join in.
Step 1: If you are using a print fabric for the front of your stocking, trace the stocking template on the wrong side of the fabric. If you are using the pieced panel, the traced outline of the stocking you used for the piecing will show through the Thermore.
Step 2: Layer your batting, lining and print/pieced panels in the following order:


Step 4: Trim around the stocking outline, leaving a 1/4" seam allowance. Clip the seams on the curves, cutting the seam allowance perpendicular to the seam line but being careful not to cut into the seam itself.


Well, not looking fun yet. Keep going
Step 6: Now reach in between the two print layers and turn the stocking inside out again.


Aren't you glad you kept going? I forgot to take a picture, and the stocking is now in the care of the postal service, on its way to Nova Scotia, so I can't do it now, but I trust me when I say that the inside of this stocking is beautifully finished, with no unfinished edges. There is still that unfinished top, but adding the cuff will take care of that.
Step 7: Trim the top of the stocking to get a clean, straight edge.

Step 1: Fold the 2" x 5" piece of fabric in half lengthwise. Press. Unfold fabric. Fold long sides of fabric to the center fold. Press.

Step 2: Fold in half lengthwise again to enclose the raw edges.

Step 3: Topstitch about 1/8" from each edge.

Step 4: Fold strip in half end to end and baste the ends together to make a loop.

Step 5: Pin the loop to the inside of the stocking, matching raw end with the raw edge at the top of the stocking.

Step 1: Fold the cuff fabric in half end-to-end. Sew the ends together with a 1/4" seam allowance. (Check that the resulting tube fits snugly inside the top of the stocking.)

Step 2: Bring the raw edges of the tube together, encasing the wrong side of the fabric. This will become the cuff.

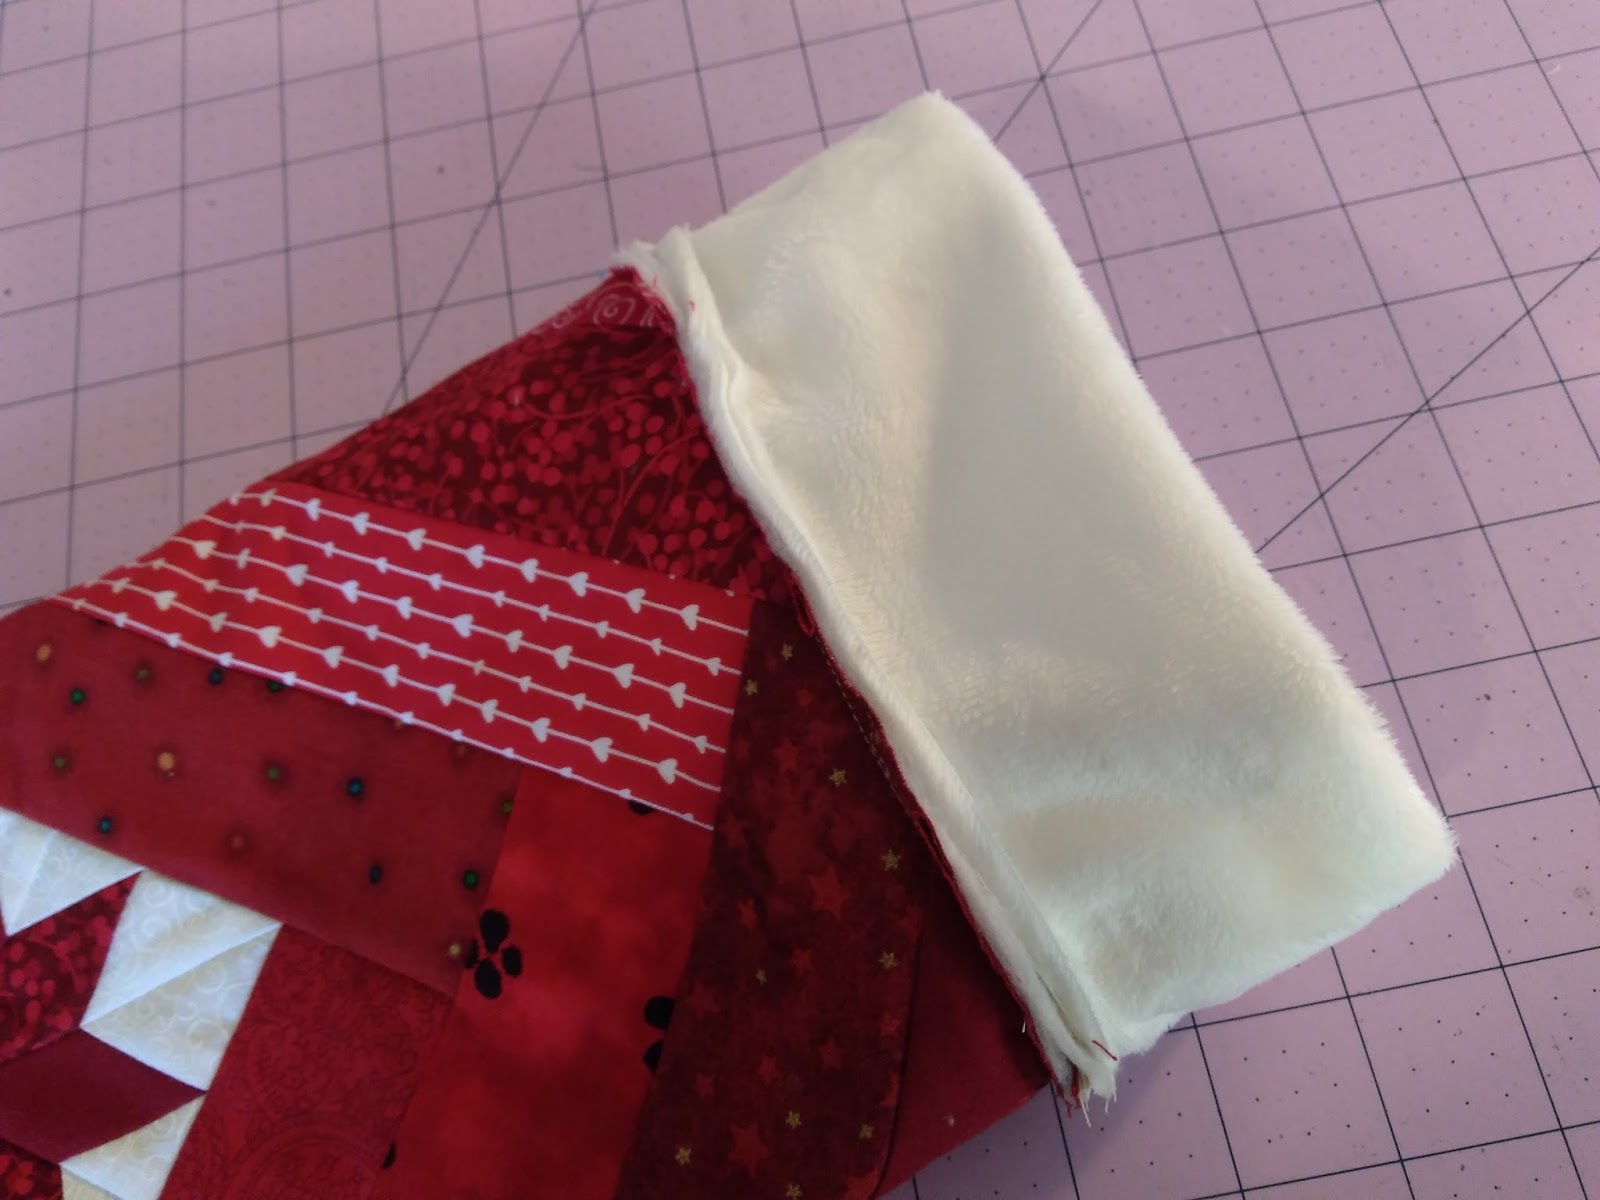
I used Cuddle fabric (similar to minky) for my cuff and I have to say that stuff was awfully slippery. By the second stocking, I figured out to baste the raw edges of the tube together before the next step. I don't think this would be necessary with less slippery fabrics, but I guess it wouldn't hurt.
Step 4: Tuck the cuff into the top of the stocking, matching raw edges of the cuff with the raw edge at the top of the stocking, distributing the fabric as evenly as possible. A little bit of fullness here and there is OK. Pin into place and sew all around, 1/4" from the edge.

Step 5: Pull the cuff out of the stocking and bring it down over the raw edge.


There you go. You're done! You might want to make another one to keep it company.

Materials :
- Stocking template of your choice (I just traced an existing stocking onto freezer paper and added 1/4" around the shape to account for bulk at the seams)
- 2 rectangles of thin batting* - I used Thermore
- 2 rectangles of lining fabric*
- 2 rectangles of print fabric* (or one rectangle and one pieced panel large enough to fit the template plus at least 1/4" all around
- 2" x 5" piece of fabric for hanging loop
- fabric for the cuff (length = twice the width of top of stocking + 1/2" for seam allowances, height = twice the height you want the cuff to be + 1/2" for seam allowances)
Materials for optional pieced panel
- 1 - 4 1/2" (unfinished size) pieced block (or fussy cut print square)
- assorted scrap strips
- 1 rectangle of Thermore (or lighweight interfacing you can see a traced outline through) large enough to fit stocking template plus at least 1/4" all around.
Piecing the optional panel
(Skip ahead to the next section, Stocking body assembly, if you are using a print instead of a pieced panel for the front of your stocking.)
Step 1: Trace the template on a piece of Thermore. Make sure you use a marker dark enough to show through on the other side of the Thermore as well.
Step 2: Place your block or 4 1/2" fussy cut square right side up on the batting, positioning where you would like to see it in the stocking shape.
(It turns out I didn't take enough pictures of this part as I made my stocking, so I just made a rough start on a mini stocking too illustrate. Pretend the white square is actually a star block!)

Step 3: Choose a scrap strip that is long enough to extend along one full side of your block and past it, overlapping the drawn line of the stocking shape. Place the strip right side down on the block, matching one end with one side of the block and one side with a side of the block. The strip should extend past the block, over the stocking outline. Sew the strip down with a 1/4" seam. Fold the strip back, out of the way of the square, and press. You now have a strip sewn to one side of the block.
 |
| Sigh. I forgot to take a picture of the strip folded back out of the way of the square. |
Step 4: Add a second strip to another side in the same way, ensuring that it covers the end of the first strip, runs along the side of the block and extends past the stocking outline.


(We now rejoin my original stocking in progress.)
Step 6: Continue adding strips in this way until the entire stocking shape is filled. Here's what mine looked like. I added the strips near the toe at an angle, but you can add them however you like, as long as any seam allowances inside the stocking outline end up covered. Notice that the stocking outline is completely covered as well.

Here's what it looks like from the back.

Next comes the stocking assembly If you skipped the pieced panel and are using a print fabric instead, this is where you should join in.
Stocking body assembly
Step 1: If you are using a print fabric for the front of your stocking, trace the stocking template on the wrong side of the fabric. If you are using the pieced panel, the traced outline of the stocking you used for the piecing will show through the Thermore.
Step 2: Layer your batting, lining and print/pieced panels in the following order:
- batting
- lining, right side up
- lining, right side down
- batting
- print, right side up
- print or pieced panel for front of stocking, right side down


Step 3: Pin all the layers together carefully. Sew along the traced outline of the sides and toe of the stocking shape, leaving the top of the stocking unsewn and backstitching at the beginning and end of the stitching. You might like to use a walking foot for this.

Step 4: Trim around the stocking outline, leaving a 1/4" seam allowance. Clip the seams on the curves, cutting the seam allowance perpendicular to the seam line but being careful not to cut into the seam itself.

Now here comes the fun part!
Step 5: Reach in between the two layers of lining fabric and pull the stocking inside out.


Well, not looking fun yet. Keep going
Step 6: Now reach in between the two print layers and turn the stocking inside out again.


Aren't you glad you kept going? I forgot to take a picture, and the stocking is now in the care of the postal service, on its way to Nova Scotia, so I can't do it now, but I trust me when I say that the inside of this stocking is beautifully finished, with no unfinished edges. There is still that unfinished top, but adding the cuff will take care of that.
Step 7: Trim the top of the stocking to get a clean, straight edge.

Making the hanging loop
Step 1: Fold the 2" x 5" piece of fabric in half lengthwise. Press. Unfold fabric. Fold long sides of fabric to the center fold. Press.

Step 2: Fold in half lengthwise again to enclose the raw edges.

Step 3: Topstitch about 1/8" from each edge.

Step 4: Fold strip in half end to end and baste the ends together to make a loop.

Step 5: Pin the loop to the inside of the stocking, matching raw end with the raw edge at the top of the stocking.

Adding the cuff
Step 1: Fold the cuff fabric in half end-to-end. Sew the ends together with a 1/4" seam allowance. (Check that the resulting tube fits snugly inside the top of the stocking.)

Step 2: Bring the raw edges of the tube together, encasing the wrong side of the fabric. This will become the cuff.

I used Cuddle fabric (similar to minky) for my cuff and I have to say that stuff was awfully slippery. By the second stocking, I figured out to baste the raw edges of the tube together before the next step. I don't think this would be necessary with less slippery fabrics, but I guess it wouldn't hurt.
Step 4: Tuck the cuff into the top of the stocking, matching raw edges of the cuff with the raw edge at the top of the stocking, distributing the fabric as evenly as possible. A little bit of fullness here and there is OK. Pin into place and sew all around, 1/4" from the edge.

Step 5: Pull the cuff out of the stocking and bring it down over the raw edge.

There you go. You're done! You might want to make another one to keep it company.

Linking up with:
Linky Tuesday at Freemotion by the River
Let's Bee Social at Sew Fresh Quilts
Midweek Makers at Quilt Fabrication
Thanks for the fun tutorial. I was looking for an easy stocking idea for my daughter. She's teaching a bunch of beginner sewers and needed something simple. This works!
ReplyDeleteGreat tutorial! I'm not in the need of making one right now, but will keep it in mind for future reference. They are very pretty!
ReplyDeleteThey're beautiful. That turning inside-out twice is magic!
ReplyDeleteThese are awesome stockings. I think I will have to make some for next year. I made felt stockings for all my kids and grandkids last year ( only 6) But those were for them to take to their homes. I now need stockings for them at my house as I do have fun things for them., And I just love yours. Thanks for the tutorial. Best stockings I have seen.
ReplyDeleteYour stockings are stunning! Love them! I still use the ones I made about thirty years ago, but maybe for next year I'll make a new set! Thanks for the tutorial!
ReplyDeleteThank you for the tute! Your stockings look great.
ReplyDeleteThank you for sharing 2 very lovely stockings and a great tutorial! Nicely done.
ReplyDeleteThose stockings are adorable! I 'think' I've made all the stockings I'll ever need for everyone, but after Christmas, I may have to make one of these just to hang in my bedroom for next year! Thanks for the excellent tutorial! ---"Love"
ReplyDeleteSuch fun stockings! I found 4 that I started ages ago (late 90's?) that are still not finished. Maybe I need to finish them up this year?
ReplyDeleteBeautiful! I have some parts cut out for a stocking for my new grandbaby. But I put it aside in order to get some Christmas gifts done. She's only two months old. She won't know she has a stocking from the Dollar Tree store hanging up for this year :) Her "real" one will get done for next year.
ReplyDeleteWow--love these stockings. I've been wanting to make new ones, but there is no time for that at the present moment. I will pin this tutorial for another day.
ReplyDeleteThanks!
I'm not usually interested in tutorials but, this one is fabulous! Thanks! I've got to try it! (Or, two of them...)
ReplyDeletethanks for this stocking tutorial, there is a hole in my mantle where there should be a stocking
ReplyDeleteso this post was perfect ,off to my sewing room
have a great Christmas
Jennifer
Nova Scotia
Thank you for such a detailed tutorial and such a great pattern. I’m with you on the I don’t think I need to replace my um 50+ year old stocking, although it isn’t knitted by my grandma, but I NEED to make one of these! Will need to check out the rulers too...
ReplyDeleteThanks for the tutorial! I've saved it in my "Christmas Projects" folder for future reference. Your two stockings look great :)
ReplyDeleteThose rulers are fun aren't they! I love how your stocking turned out, thanks for the tute, I'll pin in case I ever need to redo ours! Happy Holidays
ReplyDeleteWhat a cute stocking, and with a great tutorial to boot! No pun intended!
ReplyDeleteYour stockings are beautiful! Mice are no fun, but I'm glad you had a good excuse to make some new festive pretties!
ReplyDeleteI love this tutorial! I don't have any little kids any more, but I'm going to make this anyway.
ReplyDeleteJust finished making a stocking using this tutorial. It turned out great! Thank you.
ReplyDeleteThis tutorial is such a huge blessing! I'm making some wedding presents with your pattern, and they turned out even more beautiful than I expected. The twice turned technique is amazing!
ReplyDeleteI made two of these stockings for my two toddlers. One had a green star on a red stocking and the other had a red star on a green stocking. I drew the shape I wanted on translucent wax paper, which helped me keep the star centered, but also helped me make the the second stocking the same size and shape as the first. I hope these will be their stockings for years and years to come. Thank you so much!
ReplyDeleteI love this pattern. The layering and turning twice for the finished product is especially genius! Thanks so much for sharing. Wonderful!
ReplyDeleteI made 4 of these this year! It was a fun and easy tutorial to follow. The double turn was magic and keeps all the raw edges hidden. I used thick flannels I inherited from family and the finished stockings look great. Thanks for the detailed descriptions and step-by-step photos!
ReplyDeleteJust to say it’s 2025 and I’ve come across this tutorial - I’m looking forward to giving this a go for my sons first Christmas!
ReplyDeleteGranddaughter found this pattern and requested stockings. The directions are so clear and easy to follow. I enjoyed making two for her and her partner. Thank you!
ReplyDelete