Thursday, October 31, 2013

Bloggers’ Quilt Festival–ROYGBIV

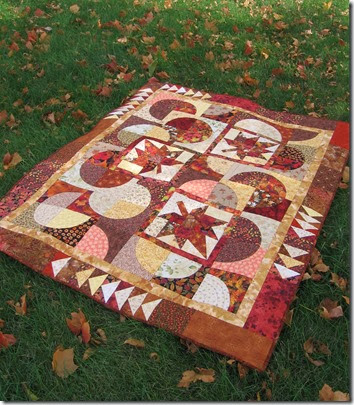
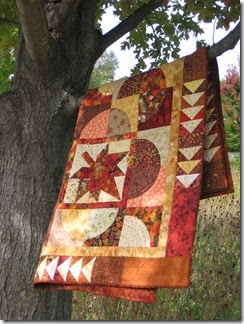
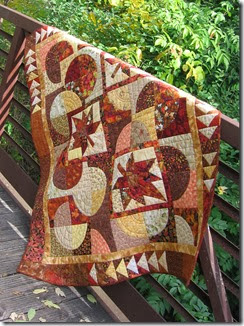
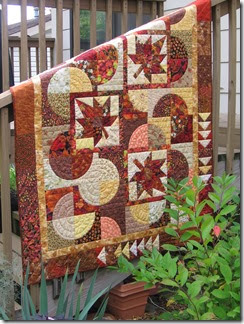
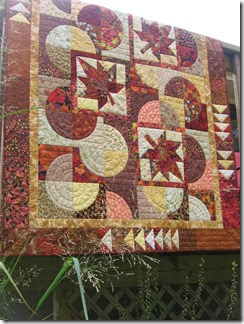
Fall Blogger’s Quilt Festival time is here again. This time I am featuring my Jelly Bean Stars quilt, entering it in the ROYGBIV category.   If you have been reading my blog for a while you have seen this one before. If you are visiting for the first time, welcome.

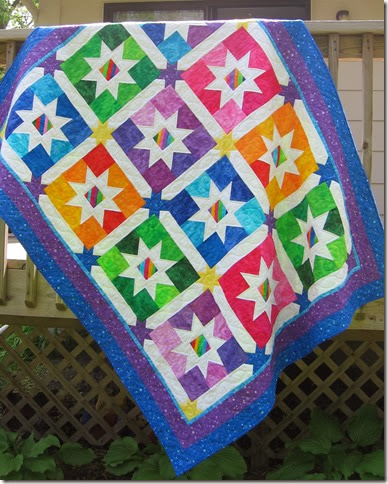
Jelly Bean Stars

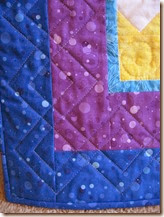
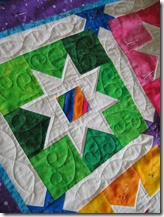
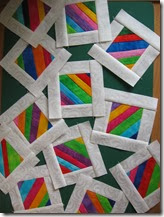
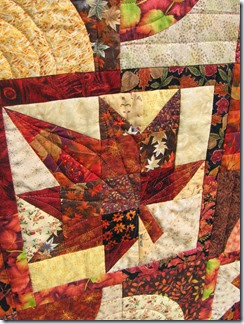
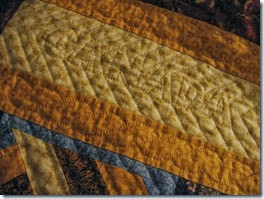
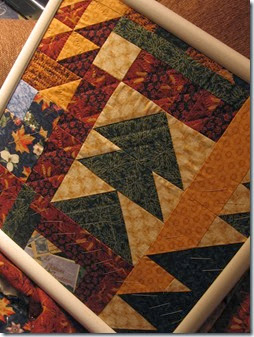
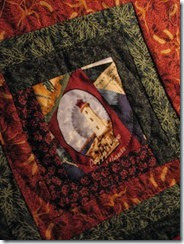
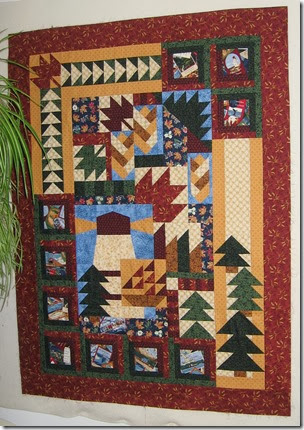
This is one of my favourites.  I love the colours.  I love the pieced sashing.  I love that I designed it so that I didn’t have to cut triangles and I couldn’t possibly cut off any points.  I love that I used up little bitty bits of scraps for the string centers.  I love the quilting in the borders, straddling the two different borders with a single motif.  I don’t love that I don’t have it anymore, but I do love the friend it went to, so it’s OK.

IMG_5873IMG_5853IMG_5714

This is also the quilt that started me thinking about writing quilt patterns.  It isn’t the first one I wrote up, but it is the one that made me think I should try.  I did write a pattern for Jelly Bean Stars this summer and it is available in my online shop.  Click the "Pattern Shop" tab above to go to the shop.

UPDATE 2019: The Jelly Bean Stars pattern has been reworked into Magnitudes in multiuple sizes. Check out the shop tab

Thank you Amy for organizing and hosting the festival again.

Monday, October 28, 2013

Basting Frame Tutorial

The idea of reducing my UFO count to zero is intriguing so I’m going to give it a shot.  After all, the list is currently only two quilt tops long.  There will never be a better opportunity!

With that in mind I got around to basting my Quilter’s Scrapbook quilt over the weekend.  This was the 3rd or 4th quilt I basted using the frame and I think I have finally figured out the easiest way to load the quilt. I took pictures this time to refresh my memory next time.

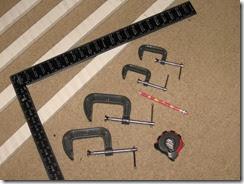
Here are all the parts and tools:
IMG_6940

  • 4  straight 8 foot long 1x2 boards wrapped in muslin (I cut two of mine down to 7’ to accommodate the low ceilings in my quilting space)
  • 4 C-clamps (they don’t have to be two different sizes, but mine came in a package like this)
  • 1 tape measure
  • 1 pencil
  • 1 carpenter’s square
  • a large supply of medium or large size safety pins (oops, didn’t get them in the picture!)
IMG_6942

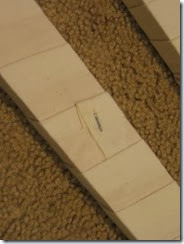
Here’s a close-up of the wrapped boards.  3” wide strips of muslin are folded in half lengthwise.  One end of the strip is stapled to one end of the board. The strip is wrapped around the board in a spiral so the raw edges are covered up by the folded edge The strip is secured at the other end with another staple.  I did this last year and forget how many strips I needed to cover the whole board.

The midpoint of each board is marked.


Setting up the frame

Figure out the minimum size the backing needs to be.  I like to have 3” or more extending on all sides of the quilt, so for my 59” x 73” quilt the backing needed to be at least 65” x 79”. 

Basting frame marking 1

I used these measurements to mark my boards.  I’ll show the top board as an example.  That is the board the top edge of the backing (65”) was attached to eventually.

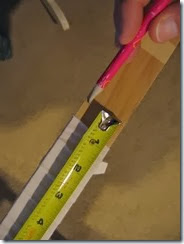
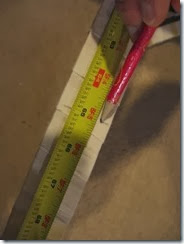
Half of 65” is 32.5”.  I lined up that measurement on the measuring tape with the midpoint mark on the board, as pointed out by the pencil.
 

IMG_6944IMG_6945

I then marked the board at 0” and 65” with the 32.5” mark still lined up in the middle of the board.

I repeated this for the bottom board and again (using the 79” side measurements) for the two side boards.


IMG_6950


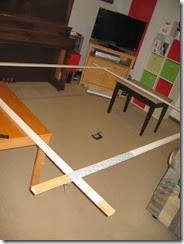
I balanced the top and bottom boards on two small tables (chairs or sawhorses would work as well) then placed the side boards across them to form the frame. 


Basting frame marking 2


I used the length markings I made earlier to determine where to cross the boards to make the frame the correct size.  Note that the marked lengths are the outside dimensions of the frame.


Using the carpenter’s square I made sure each corner was square as I clamped the boards together with a C-clamp at each corner.
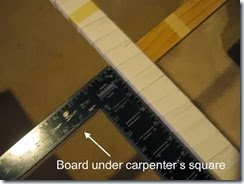
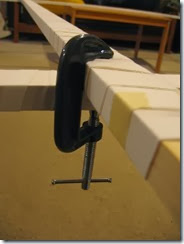
Basting frame marking 3

IMG_6951


Loading the quilt

My brain was properly engaged by this point so I remembered to load the quilt back with the wrong side of the fabric facing up.  (I mention this important detail because I did mess this up once in the past. Fortunately I noticed before adding the rest of the quilt layers!)
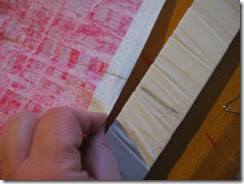
IMG_6953


To line the back up properly in the frame I marked the middle of the top edge of the backing and matched this point up with the midpoint mark on the frames’ top board.
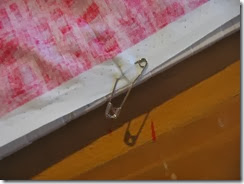
 

IMG_6954


Using a safety pin I pinned the midpoint of the backing’s edge to the muslin covering the board, keeping the center marks matched up.  I used a curved quilter’s safety pin but a regular safety pin works too.
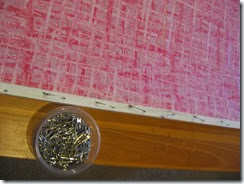


IMG_6957


I pinned the rest of the top edge of the backing to the board in the same way.
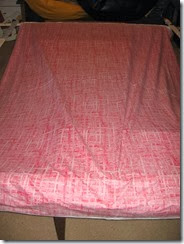


IMG_6958


I pulled the backing fabric across the frame to the other end of the frame.  You’ll notice my backing is actually longer than the frame.  That’s OK. I didn’t actually cut the backing to the minimum size I needed.  I just used those measurements to help me build a nice square frame.  I could have cut the extra off first, but I don’t enjoy measuring lengths that are longer than my rotary cutting ruler, and letting the extra fabric hang over the edge of the frame is not a problem here, so I left it for now.
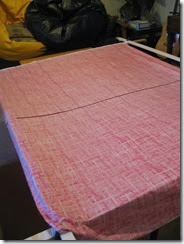
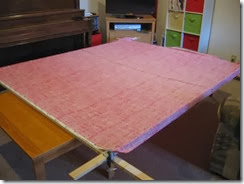
 

IMG_6961

IMG_6962


I pulled the fabric moderately taut and again matched the center of the fabric with the midpoint of the frame board, pinning the fabric to the board’s muslin wrapping.  I pinned the rest of that side as well, pulling the fabric taut . Next I draped the sides of the backing over the sides of the frame and pinned them, starting near the ends and working towards the midpoint of the sides, tugging gently to draw the fabric taut across the center of the frame as I pinned, but not distorting the back.
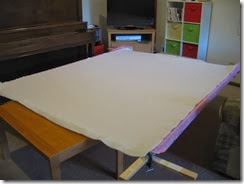
 

IMG_6966


Next, I smoothed the batting over the backing…
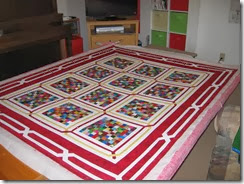


IMG_6969


…and the quilt top over the batting.


IMG_6971


I pinned the layers of the quilt together at 4 to 5 inch intervals all around the edges of the quilt and in 5 or 6 places in the center.


Here comes the part I like best. There was no need to bend over or crawl over the quilt to pin-baste the rest.  I just tipped the frame on its side and leaned it against a wall (well, in this case against the shelves I have lining the wall). It was out of the way and secure enough to leave out so I could baste standing up or sitting in a low chair in small bits of time now and then over the weekend.
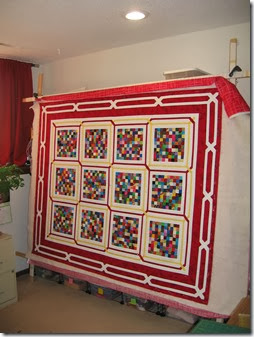
IMG_6972

I basted this one with safety pins about 4 or 5 inches apart.  My rule of thumb is that, once I have finished basting, if I lay my hand on the quilt sandwich I should be touching at least one safety pin , no matter which part of the quilt I am touching. This frame also works for thread basting, which I prefer if I am going to hand quilt.
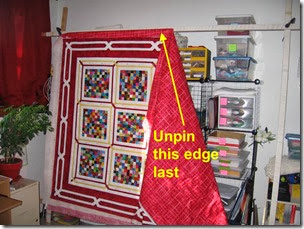
Basting frame 4

To remove the basted quilt from the frame I unpin the three lowest sides first.  I save the top for last.  By the time half the quilt is detached from the frame, I can throw the quilt over my shoulder to take the weight off the safety pins as I remove the last ones.
IMG_7046

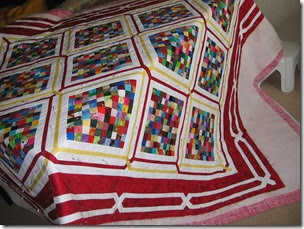
VoilĂ ! One basted quilt ready for quilting.  I am hoping that should go fairly quickly as I am not planning any elaborate quilting.  I’m off to move the sewing machine into position!
Saturday, October 19, 2013

Just in time for cool weather

Autumn Moons is finished, just in time for cooler fall evenings.  It has already been curl-up-on-the-couch tested by both kids and declared cozy.

IMG_6888


IMG_6898IMG_6887IMG_6913IMG_6901

IMG_6904

As you can see I had trouble picking a picture…

All the quilting was done with a walking foot, taking the curves slowly, figuring out where to start each curve to minimize the amount of quilt that would need to be pushed around through the throat of the machine as I turned the fabric under the foot.

For the quilting in the leaves I tried a curvy leaf shape inside one pieced leaf but wasn’t sure I liked it.  In the next leaf I tried just straight lines from each point to the stem.  That was OK, but still not quite right.  In the third leaf I did both.  That was a winner so I went back and added the missing parts to the previous two leaves.

The unquilted tops list is now officially a shortlist of two!  Well, two plus the 3/4 quilted Canada Quilt in progress, but as it had lots of quilting on it by now I don’t think it belongs on the unquilted list anymore.  Unfinished, but not unquilted!

Now I need to decide which top to quilt next:  Seeing Stars or Quilter’s Scrapbook.  I’m toying with the idea of hand quilting one, but maybe I need to finish hand quilting the Canada Quilt before I decide.  I know I need to get started on a bed quilt for my son as well (his current one has started shredding) and I’d like to hand quilt that, so maybe I should just machine quilt both current tops.  Decisions, decisions.  Plus there’s a ridiculous part of me that thinks maybe I should set myself the challenge of taking all my quilts to the finished stage before I cut into fabric to start a new one.  If I do that will I lose my quilting license?


Update: The pattern for Autumn Moons is now available in my shop!

Sunday, October 13, 2013

Slow Sunday Stitching

Today I am linking up with Slow Sunday Stitching over at Kathy’s Quilts.  There are lovely hand stitching projects there every week and it’s nice to know I have company in the slow stitching department.

I’m still plugging away at hand quilting my Canada quilt, picking up momentum as it gets closer to completion.  There’s nothing like seeing the end in sight to motivate me!  I think the quilting is about 3/4 done, and all the bits for which choosing a quilting motif was challenging are finished.

IMG_6786

These are not the true colours.  They are really much brighter, but adding light or using the camera’s flash washes out the quilting.  It’s just not a good time of day to take pictures of quilting details!

Looking at this now, I wish I had left some unquilted space behind the letters. The letters seem to have lost definition.  I may go back and redo this, or I may not.  I have already rethought, unpicked and redone a few other parts of the quilt and I’m not sure I have enough enthusiasm left to do that again!  Perhaps once I’ve finished everything I can reconsider and decide if this little bit bothers me enough to redo.
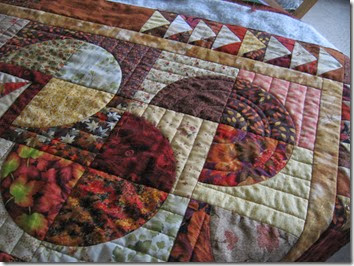
IMG_6782Tonight I’m working on the last corner of the quilt center.  Next up will be the trees and the last 5 log cabins in the pieced border, and finally the plain outer border.

IMG_6781

IMG_6154

Friday, October 11, 2013

Walking foot quilting again

I am determined to whittle down the list of flimsies waiting to be quilted.  I know my pile isn’t as high as some others’, but I really start to spin my wheels and be very unproductive when I have too many unfinished projects in my sewing nook.  I just don’t know where to start and feel guilty working on new ideas.

IMG_6779So, in the last couple of weeks I pieced a quilt back and basted and started machine quilting last fall’s autumn themed quilt. (Last fall’s flimsy.  Do you see the inertia a project acquires once it becomes a complete but unquilted top?)

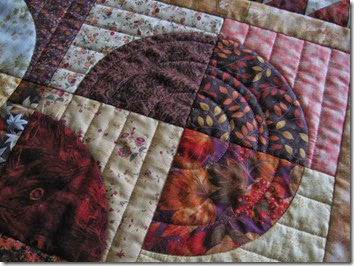
This one measures about 48” x 60”, not a bad size to manage on my machine.  These days I am drawn to the crispness of straight lines so Walking Foot and I are continuing to work on our partnership.  We’re stretching a bit to include arcs.  I know the accepted wisdom is to use free-motion quilting for curves, but I know my current free-motion limits!  I want crisp arcs in those circles, and my free motion skills won’t give me those so I’m turning the fabric under the walking foot.  I don’t know that I would do it if this was a larger quilt to wrestle with, but it’s working well enough for this one.
IMG_6773

IMG_6774

So far I have quilted all the straight lines in the background as well as quilted in the ditch around the maple leaves and circles.  It doesn’t show up well in this picture but each quarter of the circle has a different set of concentric curves quilted in it.  There are only 33 more quarter circles to go!  And the border… 

I am enjoying the luxury of leaving this project out and working on it a little bit at a time as I feel like it  With my new-to-me work table, I don’t feel the urgency to get it done quickly to unclutter the dining area upstairs like I did when I had to do the quilting on the kitchen table.  I wonder if feeling like I needed to clear a long uninterrupted stretch of days to get a quilt quilted in one big push contributed to  me dragging my feet about getting around to the actual quilting?