Showing posts with label tutorial. Show all posts

Monday, December 5, 2022

How to Make a Zippered Pillow Cover

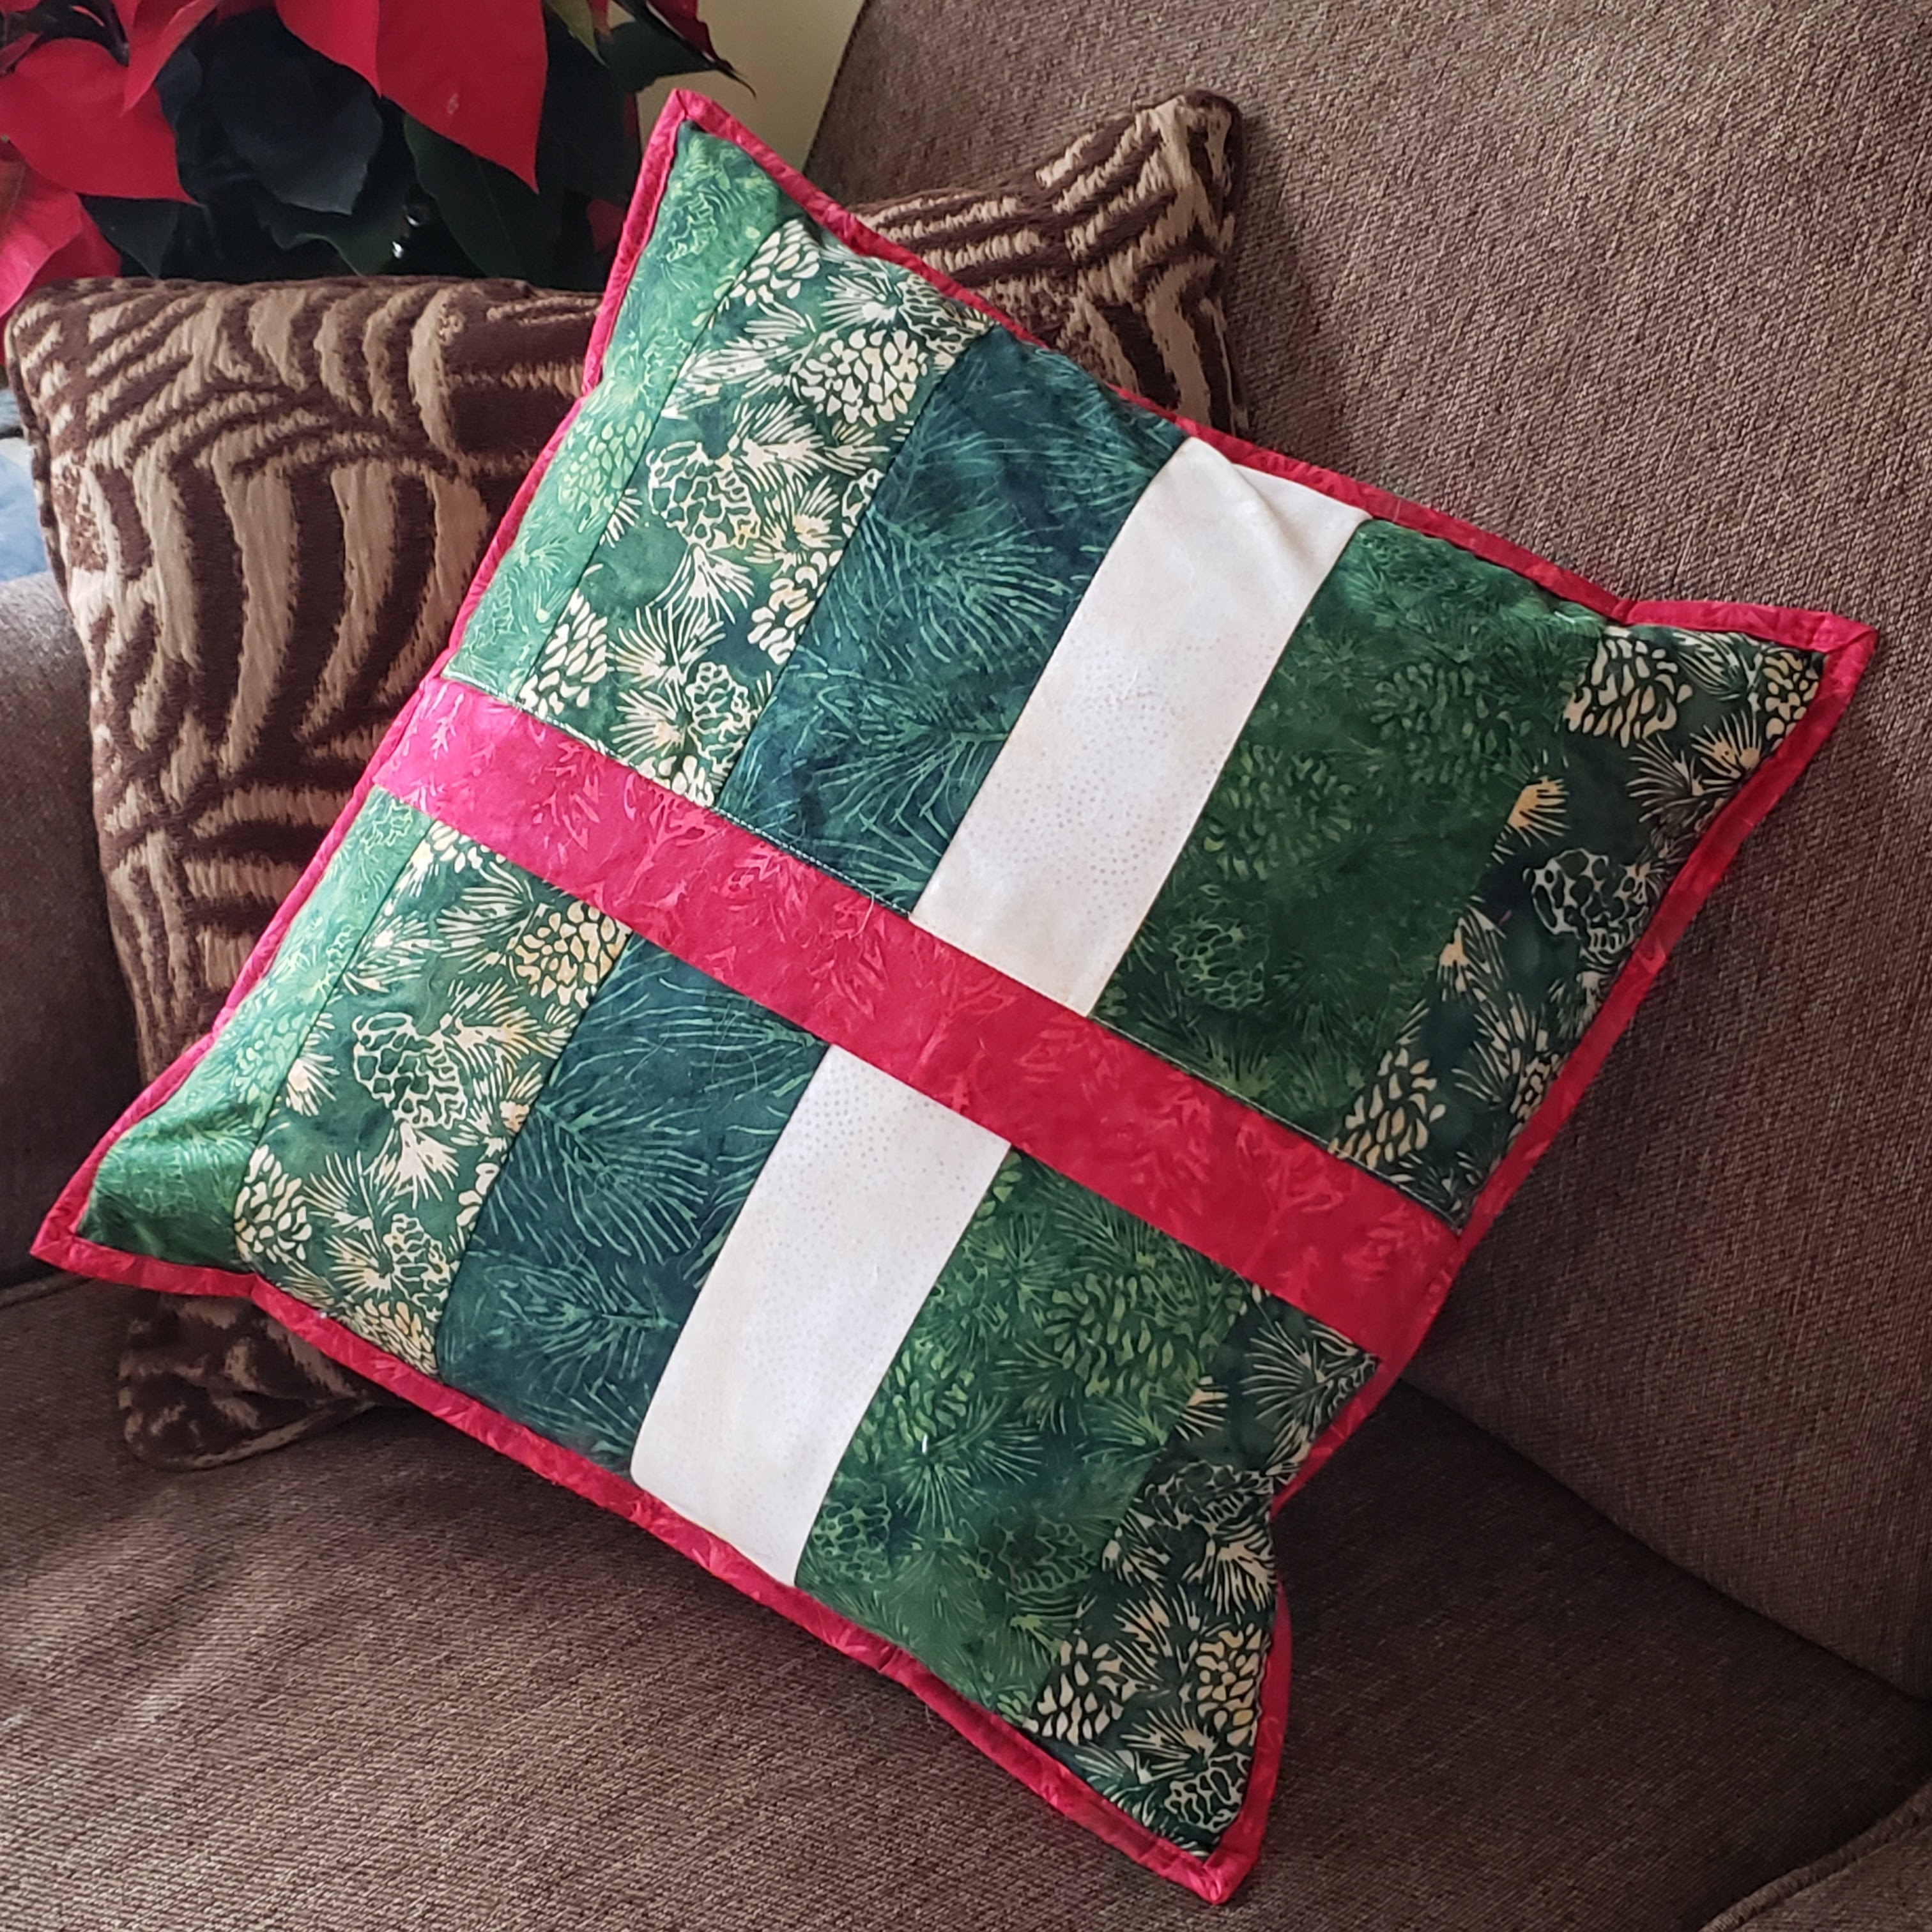
On Saturday, I tried to get into a festive spirit by blasting Christmas music and sewing with Christmas fabric.  I pulled out a small scrap project and decided to turn it into a pillow to start adding a touch of Christmas color to my living room.

Pillow made with scraps from Winter Wonders collection from Island Batik

When I made a zippered pillow in October,  I had to figure out how to do it all over again, as the tutorial I had previously followed had disappeared and I couldn't find quite the right keywords to search with to find an alternative.  I had to figure it all out again when I made this Christmas pillow.  To avoid having to figure it out next time, I took pictures this time around.  I'm writing up the directions to go with the pictures so I'll have a tutorial to refer to in future.  I hope you find it useful as well.

Click here for a printable version of the tutorial.


MATERIALS

  • Pillow form
  • Pillow top - can be one piece of fabric or a pieced top, sized to fit your pillow form.
  • Back panels - see below for how to calculate the size
  • Accent strip to hide zipper - 4" x width of backing panels
  • Binding - as much as you need to bind around the pillow (add up the lengths of the sides and add as many extra inches as you need for your preferred method of joining binding ends)
  • Zipper - choose one that is a longer than the width of the pillow, and that you can sew over and easily cut (no metal teeth!)


Tip:  Consider making your pillow cover smaller than the pillow insert for a plump, full pillow.  

  • For pillows under 18" make the cover 1" smaller than the insert
  • For pillows 18" or larger, make the cover 2" smaller than the insert.

PREPARE BACK PANEL

Determine measurements and cut pieces

The pillow back can be made of a single fabric, two panels of different fabrics, or even pieced panels.  I like to make the back a little larger than the top and trim away excess fabric on the sides at the end.

Option 1 - start with a single panel (single fabric or pieced)

  • panel width = width of pillow top plus 1"
  • panel height = height of pillow top plus 1 1/2"
Cut the panel into two pieces, cutting along the width. You can choose to cut into two equal halves, or make one piece larger than the other.  For the pillow in this tutorial, I pieced fabric strips into a single panel, then cut it in half.


Option 2 - start with two panels

  • panel width = width of pillow top plus 1"
  • panel heights - the two panels can be different heights.  Start with two heights that add up to the height of the pillow, and add 3/4" to each one.

Insert zipper

1.  Layer lower panel (right side up) and zipper (wrong side up), matching edges of the zipper tape with the top edge of the panel.  Pin in place.


2.  Using a zipper foot, sew close to the zipper teeth.


3.  Press fabric away from the zipper and topstitch close to the folded edge.


4.  Press the accent strip in half lengthwise, right side out. (I used batiks, so the right side out part isn't obvious here, but you really want the right side of the fabric showing on the outside!)


5.  Matching the top edge of the panel with the raw edges of the accent strip and the edge of the zipper tape, layer the upper panel (right side up),  folded accent strip, and zipper (wrong side up). Pin layers.


6.  Using a zipper foot, sew close to the zipper teeth.


7.  Press backing panel away from the zipper and accent strip.  The accent strip will cover the zipper.


8.  Topstitch on the upper panel, close to the seam, to complete the back panel.


ASSEMBLE PILLOW COVER

9.  Layer the pillow back and pillow top wrong sides together, centering the top on the back.


10.  Pin top to back.  In particular, pin at the zipper tape on the end with the zipper pull, but take care not to pin through the accent strip layer. Orient the pins on each side of the zipper teeth so you can still slide the zipper open.


11.  Open the zipper partway so the zipper pull is inside the pillow area.  Note that the pins should hold the zipper tape in place so it doesn't shift when you open the zipper.


12.  Sew along all sides of the pillow top with a 1/4" seam allowance, then trim away excess back fabric.  Use scissors to cut through the excess zipper.  It's probably a good idea to not use your good fabric scissors for this part.


13.  Using your preferred binding method, bind the edges to finish the pillow cover.


14.  Insert the pillow form into the cover, zip the cover closed and enjoy your pillow.  


I'm really pleased with how the pieced back worked out.  I have previously used a single fabric, but I quite like the pieced look for this larger pillow.  I think this one is definitely reversible!

Pillow back made with scraps from Winter Wonders collection from Island Batik

I'm happy to report that working on this project nudged me into a Christmas frame of mind.  After tossing the pillow on the couch, I was in the mood to go buy my poinsettias, which in turn led to pulling out the Christmas décor.  The tree will wait until the weekend before Christmas when my 21 and 23 year-old kids will be around to help decorate (tree-trimming ia always a family affair), but there's now enough red and green in my house to make me smile through December.

What gets you in the holiday decorating mood?  Are you working on any holiday sewing projects?

Happy quilting,

Joanne

Thursday, December 10, 2020

A better way to use paper templates

Every now and then I want to make a quilt that uses shapes with angles that are not marked on my quilting rulers. 

My Clear Skies quilt from 2013, from the pattern Kyoto Garden by Judy Martin in her book Stellar Quilts.

I'm not a fan of tracing paper templates onto fabric and cutting out the shapes with scissors.  If instead I trace around a paper shape with a rotary cutter, I tend to end up with a gradually smaller template as I accidentally shave a little off the template, which is also problematic. However, as long as the shape doesn't involve curves, there's an easier way, as I learned from Judy Martin's book Stellar Quilts when I made the quilt above seven years ago.  I can tape the template to my ruler and use the straight edge of the ruler to rotary cut a nice, clean edge.  

To demonstrate, I'll use the templates shown below from my Stellar Breeze pattern.  You could also use specialty rulers for this particular shape, but not everyone has the budget for those.  Plus, once you figure out this technique, you can use it for other templates that may not have a ruler substitute.


Pairing paper templates with a ruler

Step 1: Make sure that the template has been printed to the required size. In my patterns, and many others, template pages include a plain square as a size reference and the pattern specifies what size the square should be.  Use a quilting ruler to check that the square is the right size.  If it is, then the rest of the printing on the page should be as well.

Step 2: Carefully cut out the templates.  I use my rotary cutter and a quilting ruler lined up with one side at a time to get clean, straight cuts.


I'm going to demonstrate first with the G/H template shown above.  

Step 3:  Use a fabric strip cut to the width specified in the pattern.  Fold the strip in half, wrong sides together, and square up the cut end of the folded strip.  Keep the strip folded.  Place the template on the strip at the cut end.  In this case, the left side and bottom edges can line up with the left and bottom edges of the fabric strip.


Step 4:  You can now see that the long diagonal is the edge you'll want to cut.  Tape the template to the underside of a quilting ruler, with the template's long diagonal flush with one edge of the ruler.


Step 5:  Place the ruler over the fabric strip, lining up the template with the fabric again as you did in Step 3.


Step 6: Use your rotary cutter to cut along the long side of the template.


Step 7:  To cut a second piece, rotate the ruler and line up the template with the previous cut...and discover that the side of the template where you need to cut to complete the next piece is in the middle of the ruler.  You just can't make that cut this way.

You could remove the template and reposition it, but unless these are the only two pieces you need, you'll be reposition things a lot.  Instead, make a second copy of the template and continue to step 8.

Step 8: With the side you need to cut lined up flush with the edge of the ruler, tape the second template to the ruler.  Just make sure it doesn't overlap the first template.  I marked the second template with a large red asterisk to make it easier to keep track.  Now you can line up the template with the previous cut again, and have a ruler edge where you need to cut to complete the second shape.


Step 9: Rotate the ruler to use the first template again to cut the next piece, than rotate to the second template to cut the next.  Continue cutting pieces on this way, alternating templates.

Step 10:  Remember that you cut through two layers of fabric because the strip was folded in half, so each cut yielded two pieces.  Because the two layers of fabric were wrong sides together, the two pieces are mirror images of each other, which is exactly what you need for a triangle-in-a-square unit.


Trimming Points

You may have noticed this template has angled cuts at the tips.  These are meant to help you line up the parts of the triangle-in-a-square properly.  If your template includes trimmed points to help you properly line up components when piecing, you can use this technique for trimming points as well. 

Step 1: To add these cuts to the G/H pieces, simply reposition the template (or a another copy) so the cut is flush with one edge of the ruler.


Step 2:  Position the ruler so the template matches the cut shape.


Step 3:  Use your rotary cutter to trim away the tip that extends past the ruler and template.


Step 4:  Repeat steps 1-3 for the remaining trimmed tip.


Another example, just to get the hang of things!

Cutting the large triangle (Template B) from my pattern follows the same steps.


You can see the second side of the triangle is under the middle of the ruler where you can't cut.


Simply rotating the ruler doesn't properly line up the angles of the template and cut strip. Because this shape is symmetric, you could flip the ruler so the template is on the top side of the ruler, but then the template is not right on the fabric.   I find it harder to line things up exactly when the template is floating a ruler thickness above the fabric, so I prefer to use a second template to position the cut for the second side of the triangle.  Again, I've marked the second one with a red asterisk.


Keep alternating between templates at each cut to cut additional pieces.  Don't worry about mixing up the templates.  If you try one and can't line it up to cut a triangle, you'll know to use the other instead.


I've shown you how to pair these two templates with a ruler, but you can extend this to other templates.  Just remember that you need to match up the side of the template where the cut will be made with the edge of the ruler, and that you can use multiple copies of the template for different angles and sides.

I hope this helps you try out some new patterns and ideas. Please feel free to send me an email if you have any questions, or to share what you've made with this technique.

Friday, March 27, 2020

Quilting On Point

On the Fence  in progress. 

While I was sewing up the sample for my next pattern, I realized I have used on point settings in a few patterns.  It occurred to me that some may find "on point" intimidating.  If you are one of those quilters, let me ease your fears.

Sewing  rows of blocks on point is just like sewing horizontal rows of blocks, with the addition of a triangle at each end of the row.  You don't have to sew at an angle. You're sewing straight lines.


Let's talk about those triangles.  Side setting triangles are the ones that will make up the sides of the quilt.  Corner setting triangles, as I'm sure you guessed, will be the corners of the quilt.


There is no way around having at least one stretchy bias edge on a cut triangle, but you definitely can avoid ending up with those stretchy edges on the sides of your quilt, where they might cause distortion. To avoid having bias edges on all sides of your quilt, you want any triangles sides that end up on the outside edge of the quilt to be on the straight of grain.

That requires the use of quarter-square triangles for the side setting triangles, and half-square triangles for the corner.  Don't confuse these with QST and HST square units.  

Quarter-square triangles are cut triangles obtained by cutting a square diagonally twice into four triangles.  Assuming that you cut your square on a straight grain, the straight grain will end up on the longest side of the triangle, which is where you need it to be for a side setting triangle.


Half-square triangles are cut triangles obtained by cutting a square  diagonally once into two triangles.  The bias ends up on the long side, leaving both short sides on the straight of grain so you have two stable sides for your quilt corners


What size to cut squares to make triangles

If you're using a pattern, the math should be done for you.  Just check to make sure the pattern uses quarter-square and half-square triangles in the right places.  If not, or if you are working without a pattern and making things up as you go along, I prepared a reference sheet for you. It has a chart of common sizes, and formulas you can use for less common block sizes.  Feel free to download and print it to have it handy when you need it.

Sewing tips

Of course, though they won't be on the edges of your quilt, the bias edges haven't gone away and you'll need to deal with them when you sew the triangles to the ends of the rows of blocks.  Don't panic and keep these tips in mind:
  • Starching or pressing the fabric with a starch alternative like Best Press before you cut can help stabilize the fabric while you sew.  
  • Press rather than iron the fabric: lift the iron to move it instead of sliding it across the fabric and potentially pulling the fabric out of shape.
  • Avoid pulling on the fabric.
  • Pin the seam before you sew.
  • When sewing two pieces together, keep the piece with the bias edge on top, away from the feed dogs so they can't pull that bias edge either. 

How to line up the triangles

You might also wonder about how to line up the triangles to fit with the blocks/rows.  I have actual photographs for this part!

Corner triangle

Remember to use a quarter-square triangle. As you can see below, the long side of the corner triangle is longer than the side of the block or row to which it needs to be sewn.


This is normal. Once all the relevant seam allowances are taken into account, everything will fit together properly. To help everything fall into place, mark the center of the long side of the triangle, and the center of the side of the block you will be sewing it to.  The easiest way to do this is to fold the pieces in half and finger press the fold.


Lay the triangle on top of the block, right side down, matching the fold marks, and pin.  Pinning will help reduce the risk of stretching the bias edge on the triangle.


Sew the seam with a 1/4" seam allowance.  Flip the triangle back and press.  I like to press towards the triangle, but do what works best for your project.


You can trim away the dog ears sticking out the sides.


Don't worry about the triangle having a blunt point where you trimmed.  That blunt point will be inside the seam allowance when you sew the rows together and add borders or binding, and your triangles will have nice pointy points.


Side triangle

Side triangles are even easier to match up.  Here you will be sewing a block/row to the short side of half-square triangle. The side of the triangle will be longer than the side of the block.


You will match the second short side of the triangle with the bottom edge of the block, and the tip of the triangle will extend beyond the top of the block.  Pin before you sew to help reduce the risk of stretching the triangle's bias edge.


Again, sew with the triangle on top so the feed dogs can't pull on the bias edge.  After sewing the seam, fold the triangle back and press the seam in a direction that works for your project.


Again, the messy dog ear tip sticking out can be trimmed off.  The tip, messy or trimmed to a blunt tip, will be in the seam allowance and your finished triangle, after all additional seams are sewn, will be nice and pointy.


That's it!  I hope you find this information useful.  

UPDATE 11/08/2025: I've refined my method to add point trimming on the setting triangles to help position parts perfectly.  You can read about that here.

Now you're all set to tackle these on-point Canuck Quilter designs:


Find these and more in my Etsy shop.