In my last post, I wrote about how to cut shapes with 45 degree angles. Continuing the 45 degree theme, let's look at how to join these shapes side by side.
Bonus for me: In working out the best way to explain I've found better ways to do things. Yay!
What not to do
The first time I tried to join two parallelograms side by side was a complete failure. It turns out you can't just match the corners to the points and sew. Take a look at how that turns out.
 |
| Lay out shapes |
 |
| Match points to corners, sew 1/4" seam |
 |
| End up with offset pieces |
What to do instead
What actually needs to line up are the spots on the sides of the shape where the seam allowance crosses the side. You'll end up with something that looks like this, with the pieces offset a little and the points sticking out past the sides.
The tricky part is figuring out exactly how much to offset the pieces. You can do this by marking or by trimming points.
Method 1: Mark the seam allowance.
Mark a 1/4" seam allowance on the wrong side of the top piece, then shift the top piece until the seam allowance meets the sides of the bottom piece.
This works well, but personally I am not fond of marking if I can help it, so I prefer to trim points with an acrylic template (method 2 below) or a paper trimming template paired with a standard rotary cutting ruler (method 3 below). I don't think one method saves time compared to another, so it comes do wn to personal preference. If you think your marking skills might not be consistent, I suggest choosing point trimming.
Method 2: Trim the points with an acrylic corner trimming template
I use this corner trimming tool to trim the points on each piece to match the angles they need to meet on the other piece. Mine came as an insert in a magazine many years ago, but they are are not exclusive anymore. I know my local quilt shop, Quilting Connection sells them. Your favourite quilt shop might also, or may be able to order one for you.
To use it, you simply place the tool over the point, matching the edges of the tool with the sides of the fabric, them use your rotary cutter to trim away the point, using the template as a guide.
I did my best with the photos below, but it still looks like the acrylic template has rounded tips. It doesn't. It actually has two straight edges, and that's what you'll cut on your fabric as well.
 |
| Line up template edges with sides of fabric |
 |
| First cut along one edge of the template tip |
 |
| Second cut along the second edge of the template tip |
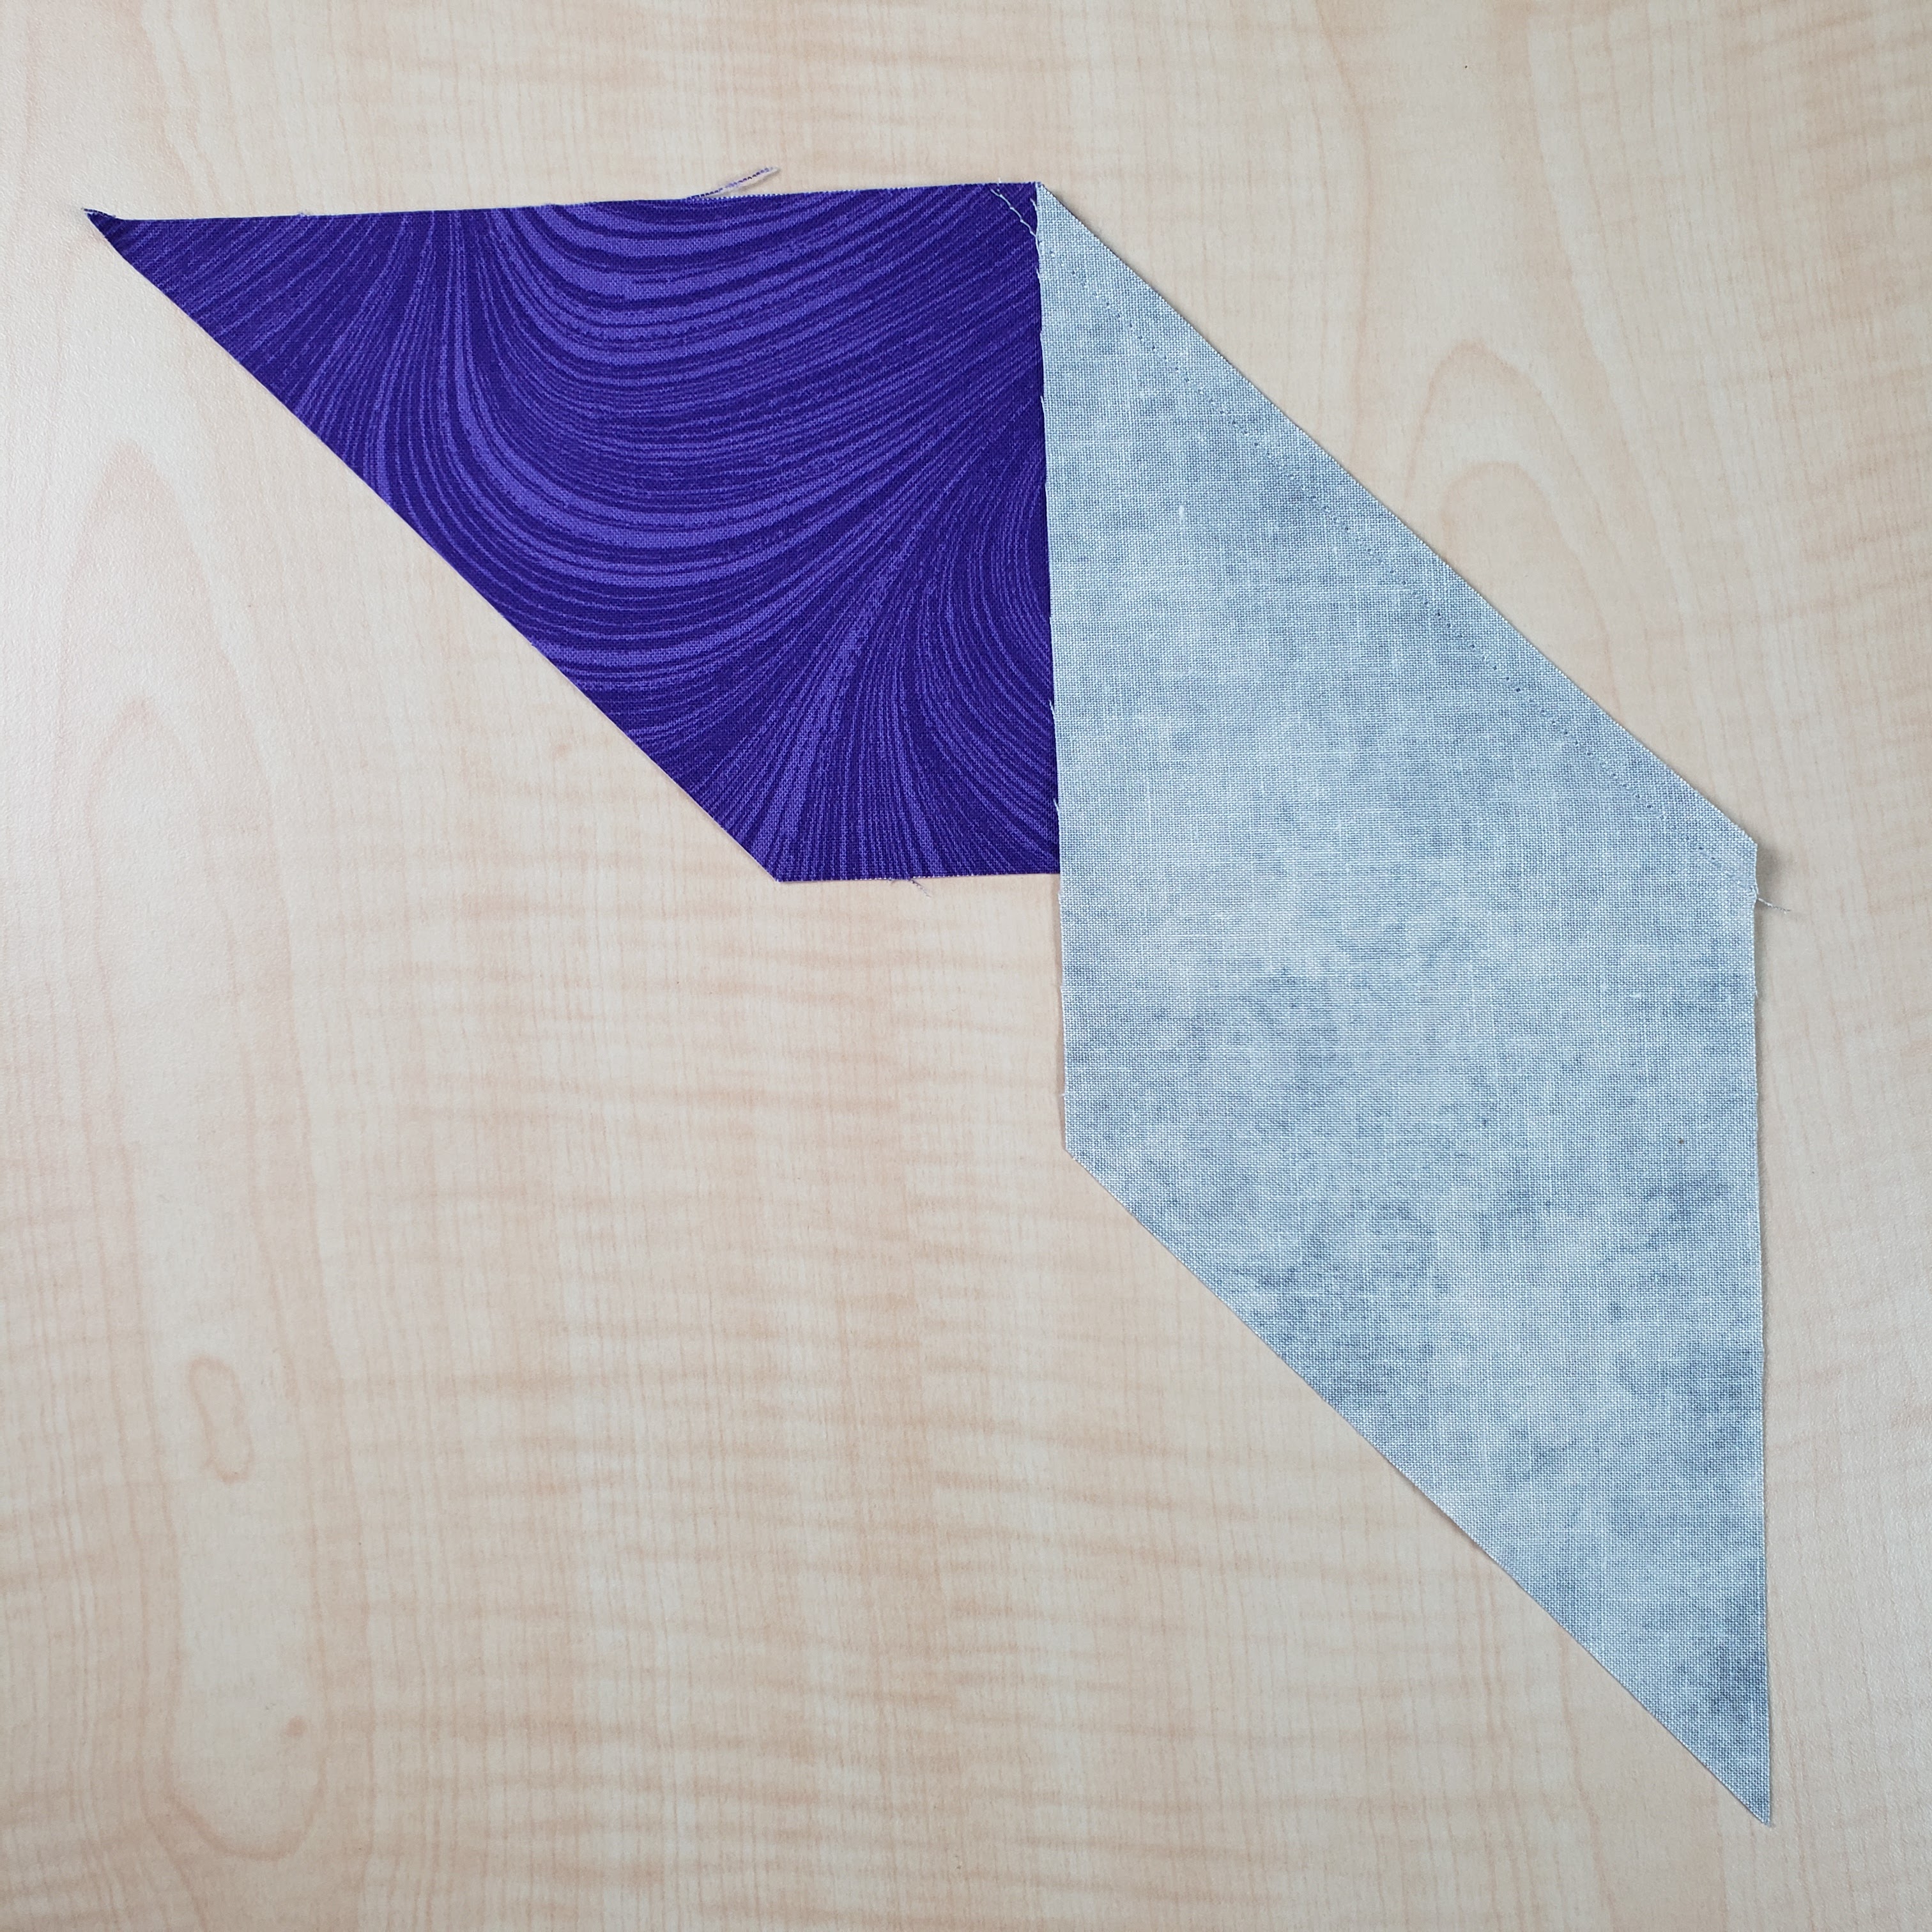
Laying the pieces together, you can see how the angle on the right of the trimmed tip on my grey piece copies the wide angle on the purple piece so they match perfectly.
 |
| Match fabric edges |
If you trim 45 degree point on the purple piece as well, it will match the wide angle on the grey piece in the same way.
 |
| Purple trimmed tip matching grey wide angle |
Here's a full front view of the two pieces lined up with corners and points matched.
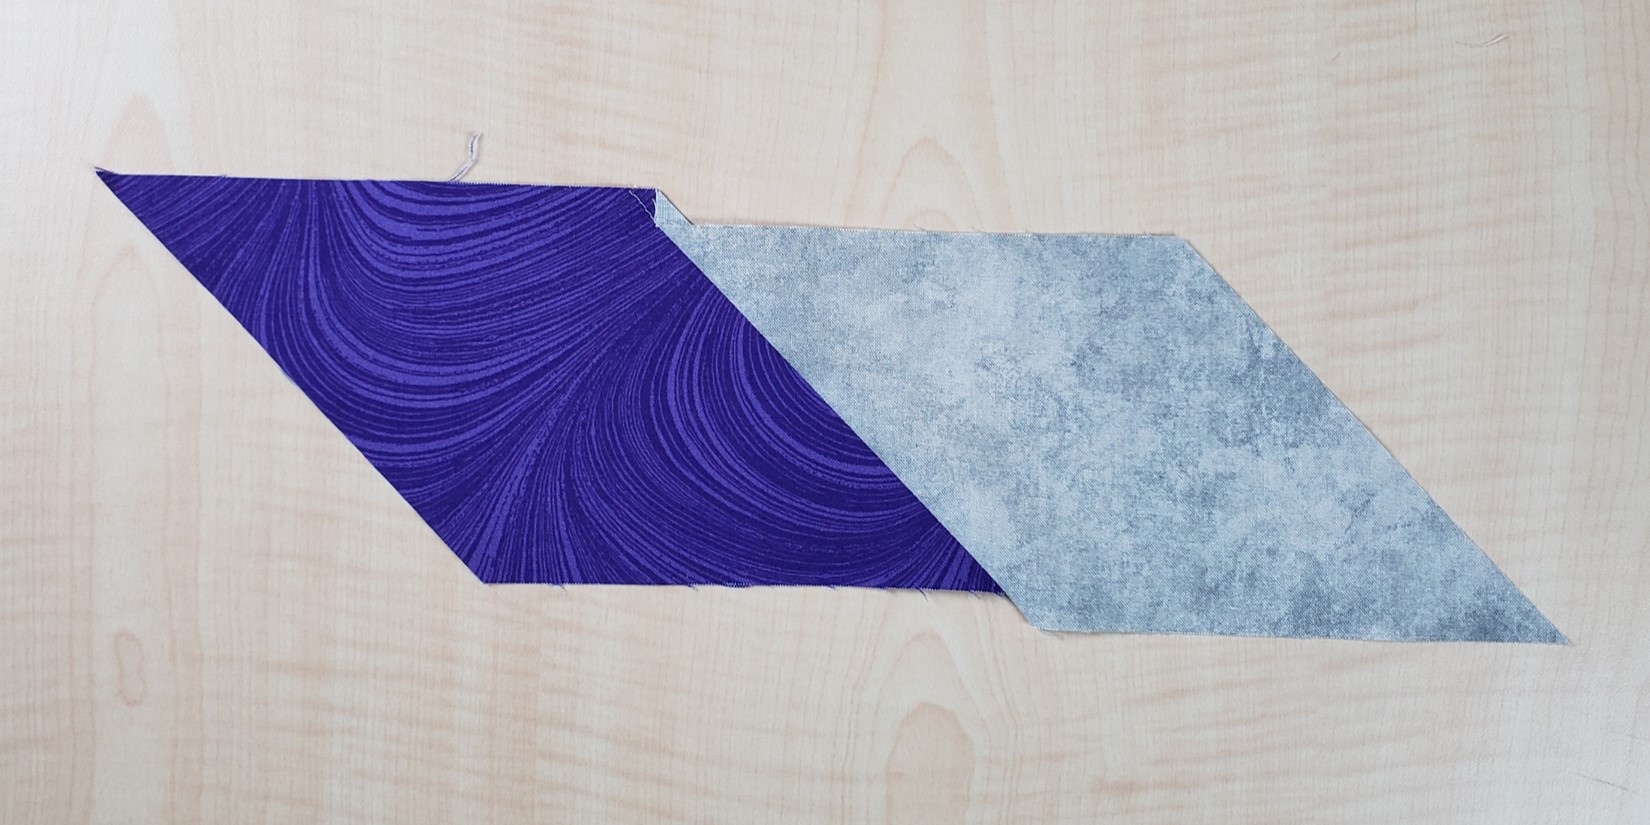
As long as just one point is trimmed and matched, the pieces should be lined up properly. However, there might be some stretching in the bias edge during sewing, pulling things out of place by the end of the seam. My preference is to trim points on both pieces to be sure everything is lined up properly at both ends of the seams, pin things in place, then sew with a 1/4" seam.
 |
| Pieces joined into a unit with straight, smooth sides |
Method 3: Trim points with paper trimming template and a regular rotary cutting ruler
In my pattern
Rush I included a paper template you can copy and cut out. It has a flat tip instead of the beveled tip of the acrylic template but it does the job. The pattern has specific instructions and diagrams for positioning the template to trim the tips properly for this particular design, but here are more general instructions to repurpose the template for any 45 degree shapes. If using it for other projects, you can ignore the markings on the template.
 |
Paper point trimming template
|
Tape the template to the underside of a square or rectangle rotary cutting ruler, in a corner as shown.
Position the template over the piece to trim as shown, rotating as needed so that one of the blunt tips of the template is perpendicular to the side of the fabric that
will not be sewn. Trim the point with a rotary cutter. Trim points on both pieces you plan to join.
When laying the pieces right sides together to sew with a 1/4" seam, the angle on each trimmed point should match the wide angle on the other piece.
Troubleshooting tip:
If you trim a point with the wrong tip on the template, the point won't match the wide angle. DON'T PANIC. You haven't ruined the piece. Just trim the point again with the other tip on the template, and you'll end up with a beveled edge as though you used the acrylic template in method 2. You'll be good to go!
That's it! I hope you found this photo tutorial useful and that you'll be inspired to branch out into sewing shapes beyond squares, rectangles and right angle triangles.
Happy quilting,
Joanne


I am not a pattern designer, but rather a quilter trying to mimic a paper collage that I love (Bridget Riley). It turns out making patterns is much harder than I imagined. Your pieces on cutting parellograms has set me back on the right track! Thank you!
ReplyDelete