
I made this last winter, and I'm finally able to share it with you, just in time for Sew a Jelly Roll Day next Saturday (September 16th). It's a fun twist on a simple jelly roll strip quilt.
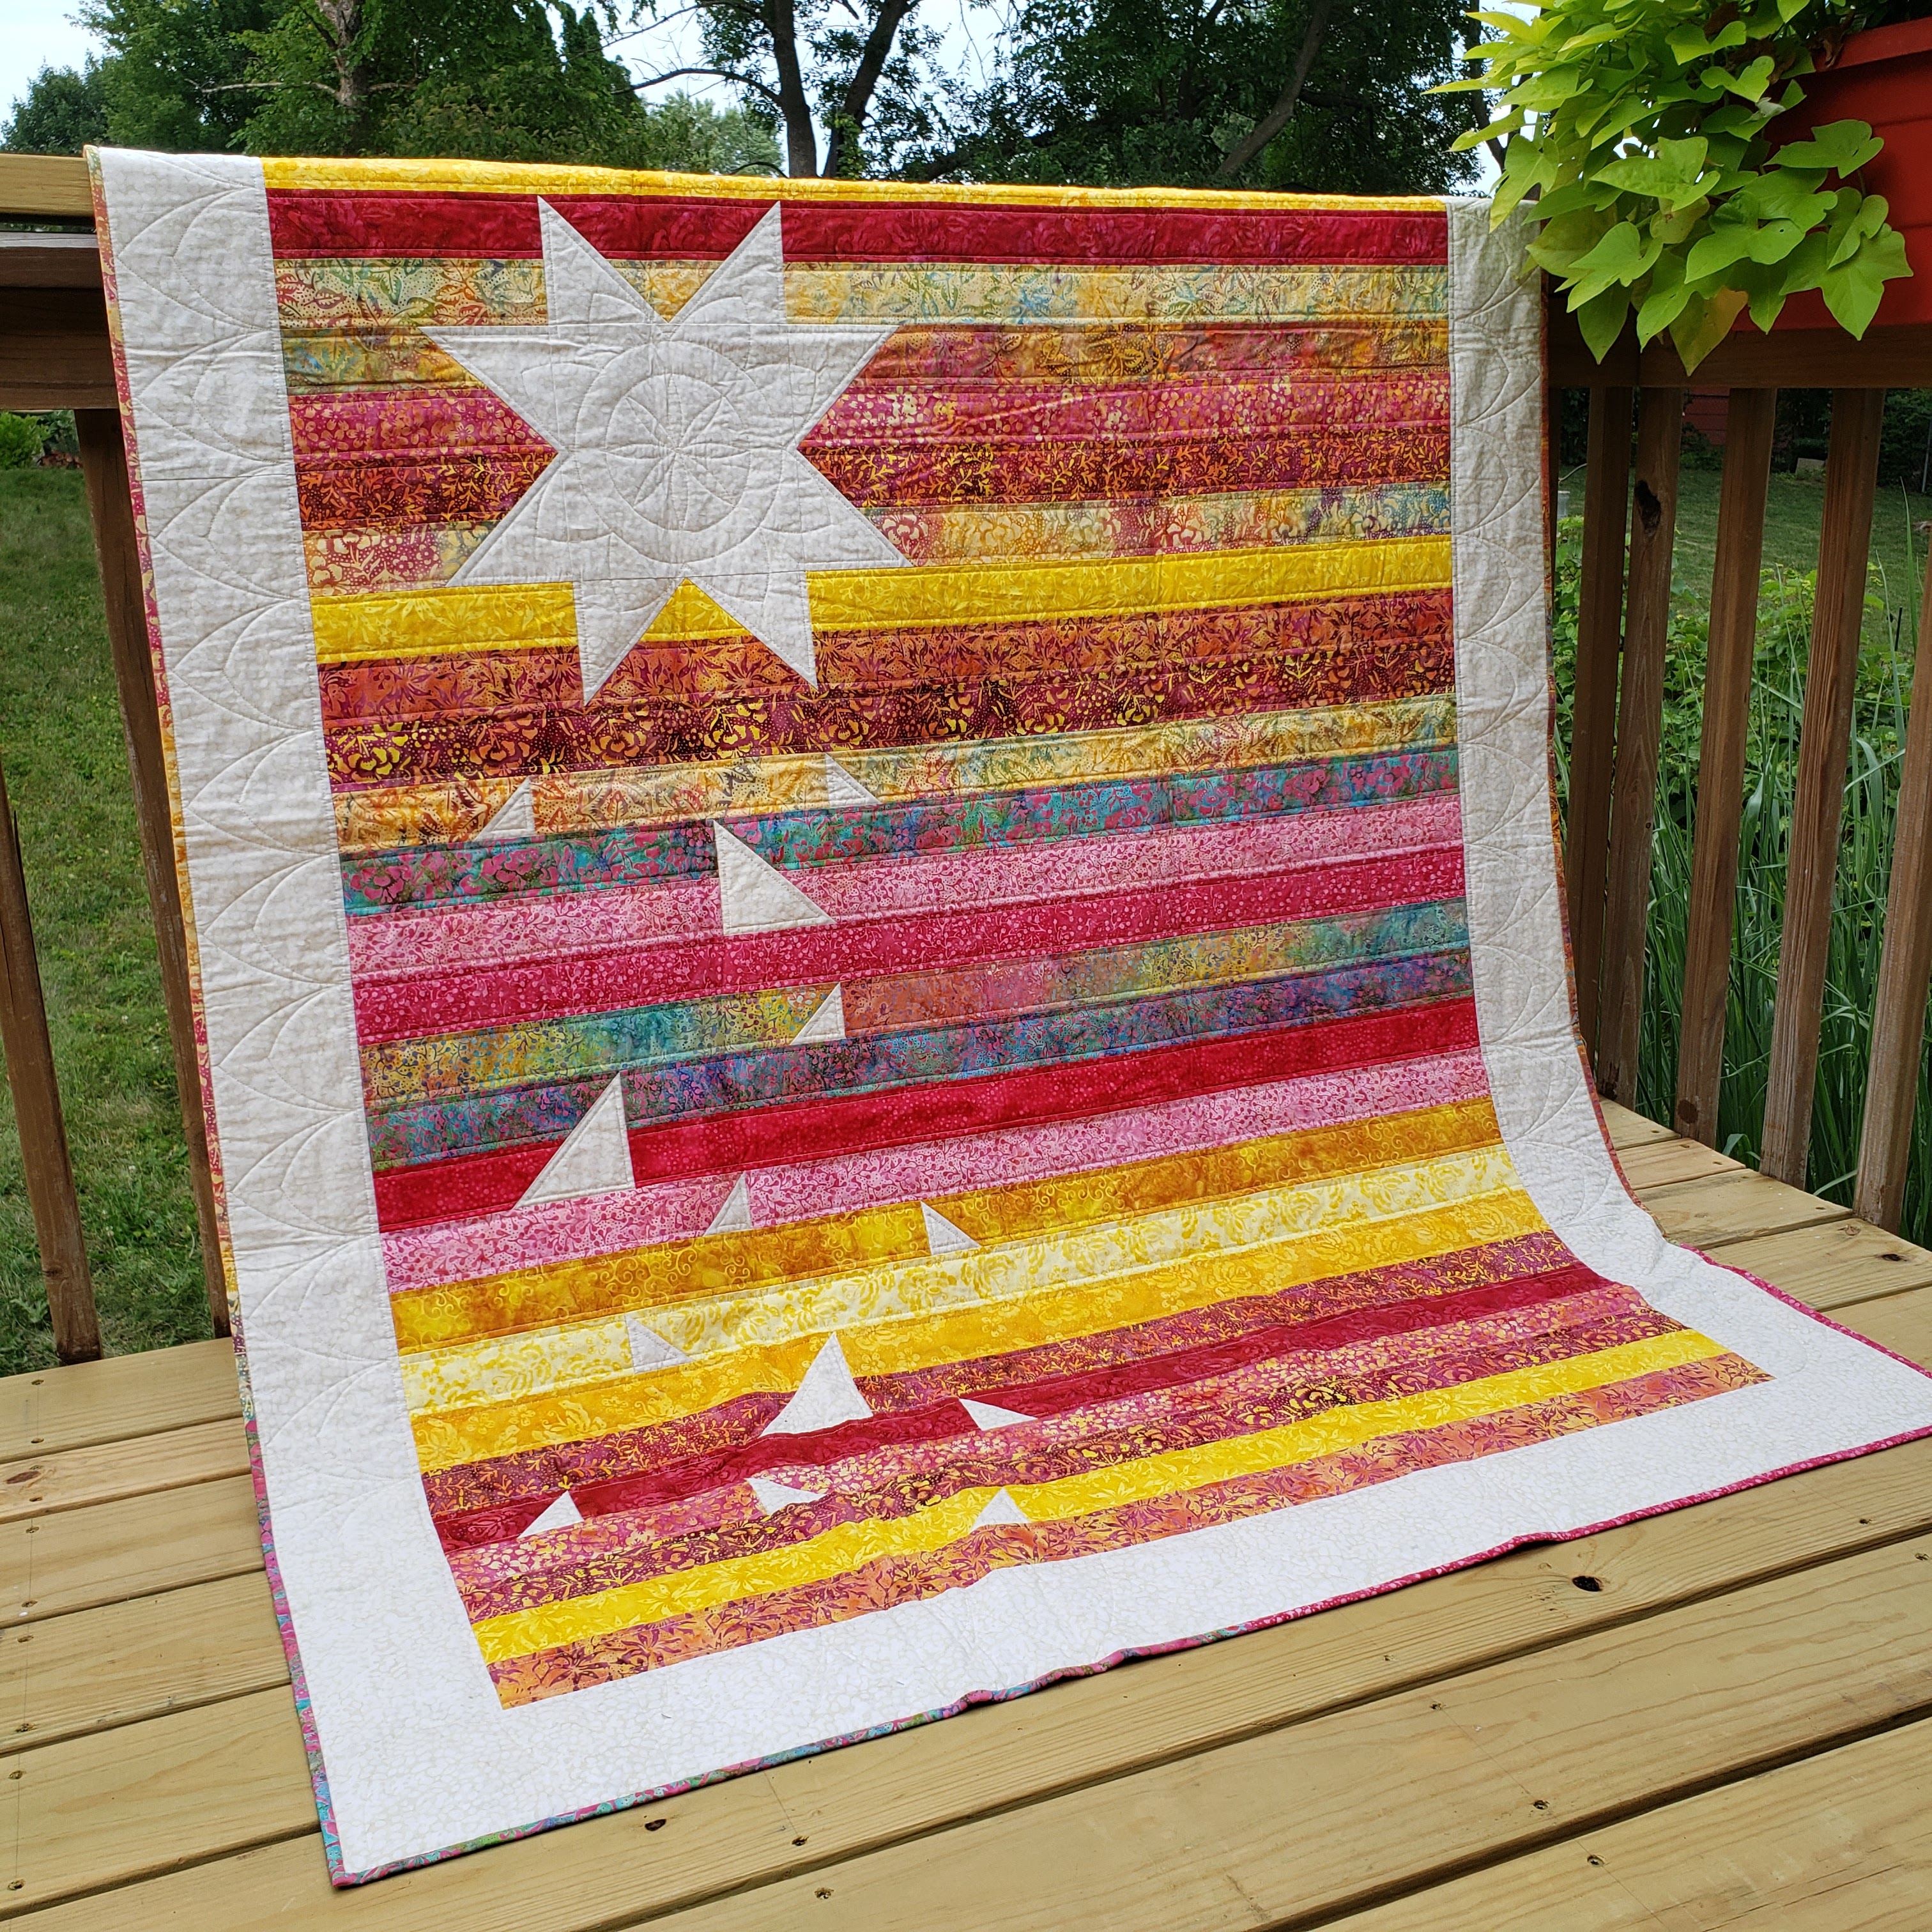 |
| Star Chips by Canuck Quilter Designs Fabric: Blushing Garden from Island Batik |
Star Chips is super easy to make. The triangles are inserted with stitch-and-flip corners, no templates or applique required. The quilt measures approximately 50" x 66". The exact width depends on the length of the shortest strip in the strip pack.
As usual, my biggest challenge was deciding how to quilt this. I'm not very skilled at quilting all-over freemotion designs, so I settled on quilting 1/4" on either side of each seam between the strips, but thought I could do some custom quilting in the stars and in the borders. I started with the stars, sketching ideas on paper, then pulling out the quilting rulers and stitching line discs to draw it out full scale on paper as I would quilt it.
 |
| Planning custom ruler quilting |
I start by drawing the patchwork elements to size, then fill in my proposed design. The stitching discs let me draw where the stitching would be if I was sewing with a ruler foot tucked up against the quilting ruler/template.
The design above looked like it would work, so I marked the quilt with all the appropriate registration lines to help me place all the stitching in the right places and stitched away. I had words with my machine when it refused to stitch in a particular direction. (This is a new problem that a trip to the machine spa did not correct, but let's not get sidetracked.) I ended up having to turn the quilt more than I should have to when freemotion/ruler quilting, but I made it work.
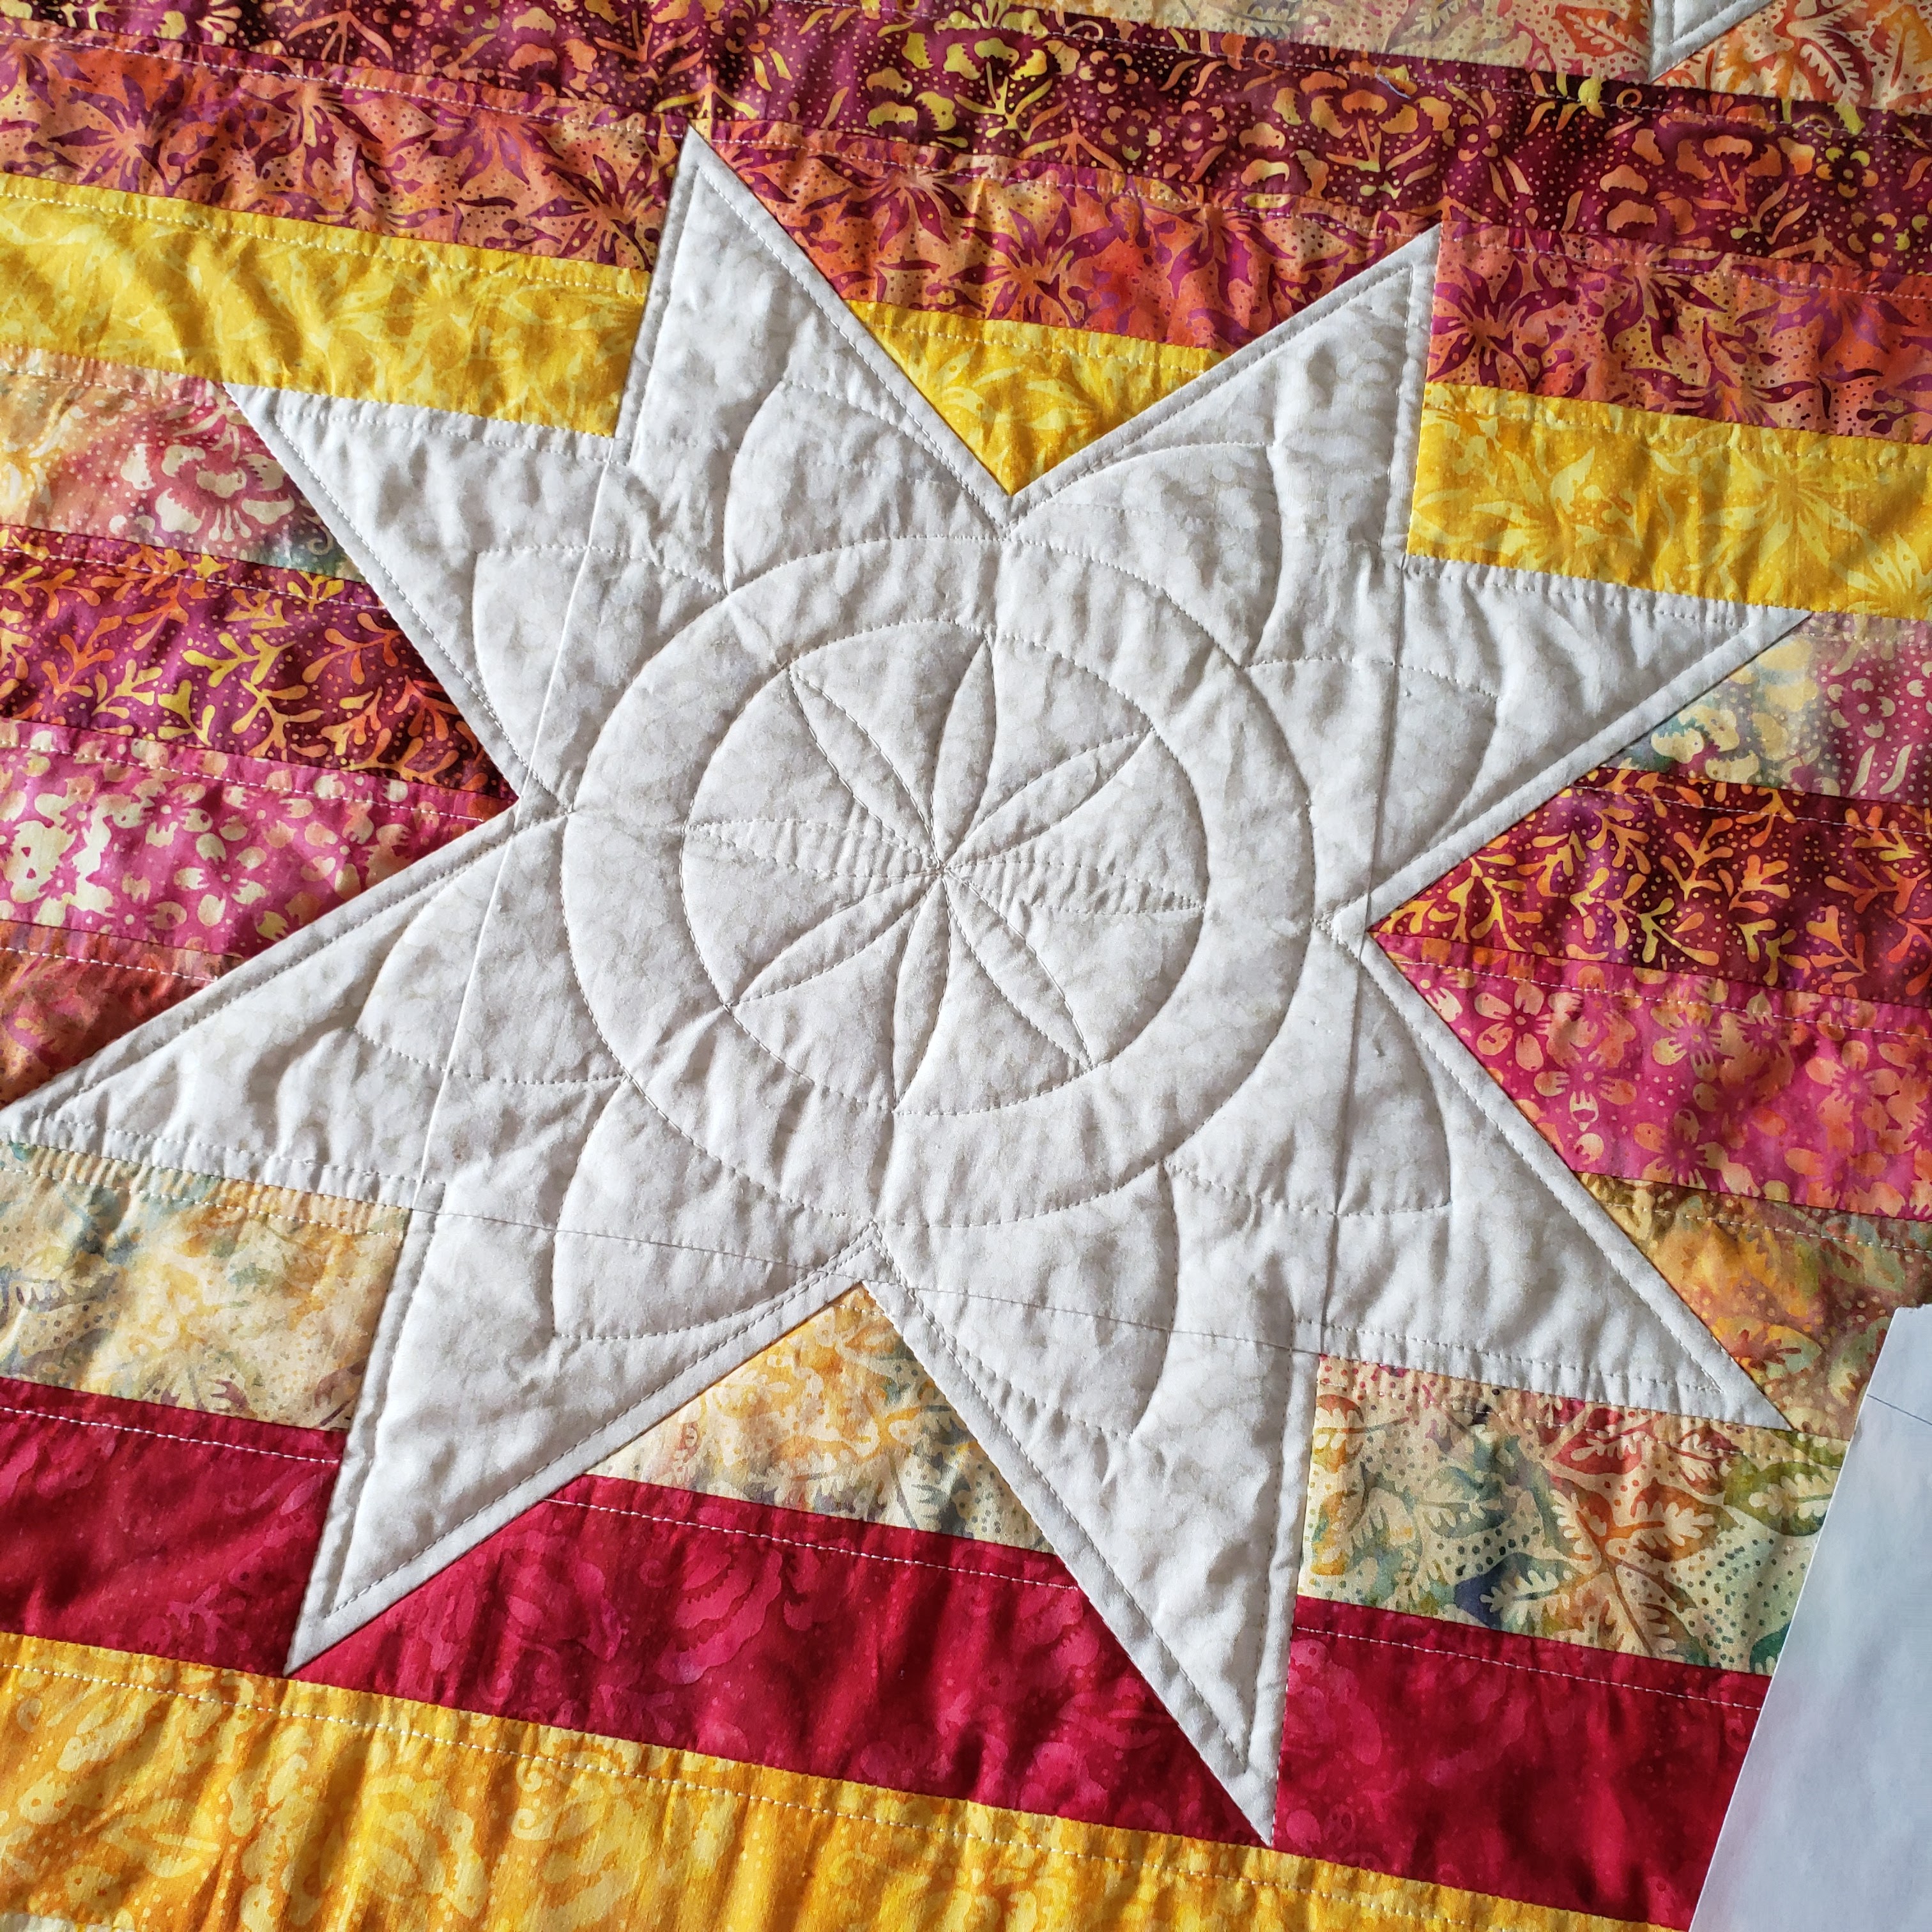 |
| Custom ruler quilting in the star |
This was stitched with my Westalee rulers. I used the straight edge of the 12" arc, as well as circles-on-quilts and the 6"spiral template.
I used a blue water-soluble pen to mark the quilt before quilting, and a water brush to erase them afterwards. I don't know what brand this brush is. It has a refillable barrel for water. You just squeeze gently to push water drops down the brush as you paint water over the lines to erase. It's a bit less messy than having to spray the whole surface to get the markings out.
 |
| Erasing water-soluble registration marks with a water brush |
I had planned to quilt walking foot cables in the borders, as I did in my Starlit Picnic quilt, but that looked denser than the quilting on the rest of the quilt. I try to keep the quilting density more or less even across all areas of a quilt to avoid bunching and waving. I slept on it, then revisited the border quilting I did on Topiaries. I had to adjust the scale a little, but the strips acted as perfect spacers to help distribute the arcs. This was quilted in two passes around the quilt using the 6" spiral template.
 |
| Detail of quilting in the border of Star Chips |
 |
| Detail of corner border quilting in Star Chips |
 |
| Scrappy binding on Star Chips |
 |
| Star Chips by Canuck Quilter in Blushing Garden from Island Batik |
What a fun quilt and I love how you quilted it. Hope you are feeling better.
ReplyDeleteCool quilt. I really like the border quilting design.
ReplyDeleteThat's an interesting yet simple pattern. Well done, Joanne. It takes you to elevate a simple star block into a new design. I love it. The quilting too is awesome; not too much, just enough to fit in the simplicity of this quilt. Bravo! ;^)
ReplyDeleteThis is a fun pattern, and a great way to use a jelly roll. Very tempting! I like to see the details of how you quilted it. Thanks for sharing that stuff. :)
ReplyDeleteYou have been in the western side of Canada while I have been on the eastern side, visiting Quebec, and then PEI and Nova Scotia. My first time in that part of the country. I really enjoyed it.
I love the quilting design you created for the star and border. The water pen is genius. Definitely need one of those. What erasable marking pen did you use?
ReplyDelete