Monday, August 26, 2013

Totally scrappy

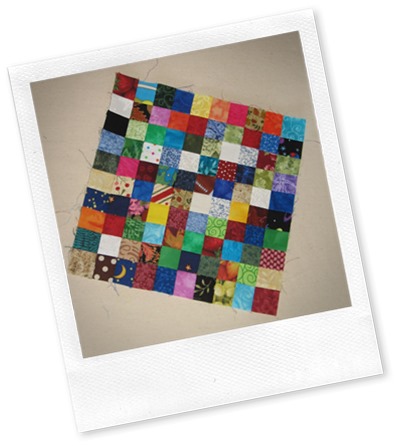
Last week’s challenge to myself was to sew together 1200 little 1.5” scrap squares together without obsessing about colour placement.  It was hard work (you know I’m a matchy-matchy quilter) but I’m almost done.  They have been wrestled down into 120 strips of 10 patches without my giving in to the urge to lay 1200 squares out on the design wall first.  Seriously, I think the totally impracticality of that option is the only thing that held me back.

Without further ado, here’s the first block of 100 patches:

IMG_6704

There are 11 more to go.  The plan is to frame them in a neutral colour and put them all together with some sort of pieced sashing, maybe a garden maze sashing.  I haven’t decided yet what colours I will work with for the sashing.  I’m waiting to finish the blocks and see if there are one or two colours that would tie them all together.

When all the blocks are done I think there will be at least one piece of fabric from every quilt I have made since I started my first quilt in 2000, plus a few bits from non-quilt projects.  The challenge will then be to remember which project each fabric represents!

Friday, August 23, 2013

Table runner?

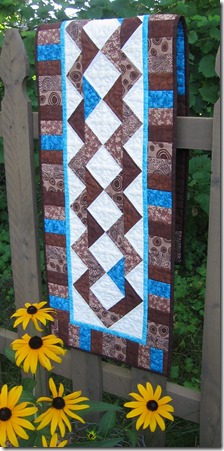
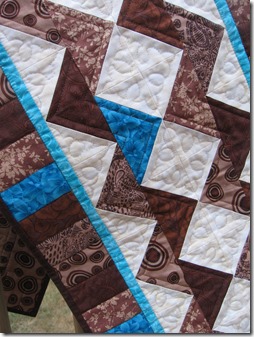
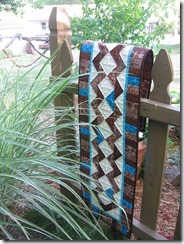
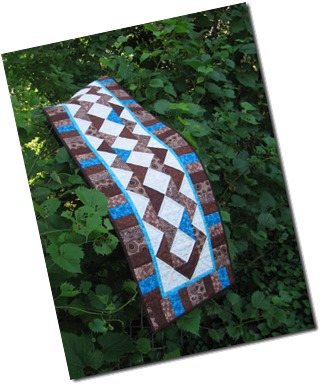
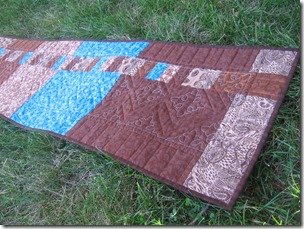
IMG_6674I did finish the gift table runner I posted a picture of last month.  I’m afraid it didn’t get mailed promptly as I tried to figure out how to take a good picture of it first for a pattern cover.  Oops!  It is now on its way however, and I did have fun tossing it over various things in the garden to take pictures.  Not one of those things was a table, but I assure you this piece is a table runner!

IMG_6657

IMG_6678IMG_6679

IMG_6684

How do you like the back?  I was very proud to squeeze almost every bit of fabric out of my six fat quarters to make this runner.  The scraps left over from making the top and extra strip set from the piano key border went into the back without a lot of bother.  So besides the 6 fat quarters that I bought on sale, I only needed to add 3/4 yard of fabric from my stash for the background, the inner border and the binding.

I’m hoping to offer this pattern for sale in my Craftsy shop by this weekend.  I just have to wait for my trusty proofreader to get home from work.  Hubby is not a quilter but he is a superb proofreader.  He doesn’t just check spelling.  He notices things like reversed diagrams, and not being a quilter he just comes out and asks when something isn’t clear, because he really hasn’t got a clue to just guess at what I meant to say. Plus he never ever complains when I ask him to proof read something yet again.  What can I say, I got lucky!

Thursday, August 15, 2013

Hand quilting again

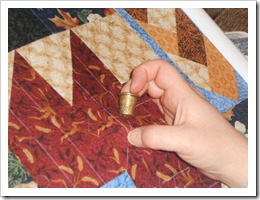
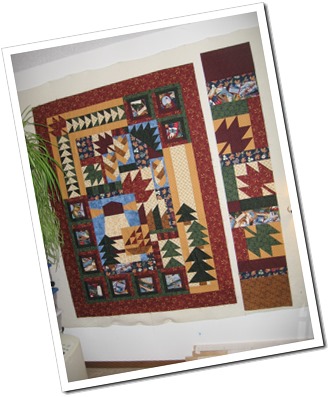
A couple of evenings ago I was moping around, feeling I would really like to have some handwork to do and wasn’t it too bad I actually had to make the binding for Clear Skies before I could sit quietly and hand stitch it to the quilt.  It took me a while to hear the Canada Quilt hollering at me from upstairs: “What am I, chopped liver?”  Nope!  It qualifies as handwork!

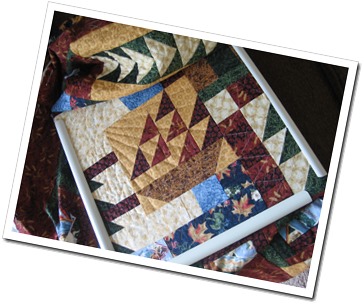
DSCN1131It has been sitting untouched in the work basket in the living room since May when the weather got too hot for me to want to sit with a quilt in my lap. However, evenings have turned unseasonably cool here this week.  I’m sure it won’t last, but as long as it does I’m happy to be able to sit and hand quilt in the evening without overheating.

Taking a break from the quilt turned out to be a good thing, despite delaying the finish. Back in May I was trying to catch up from the quilting time I missed due to tendonitis, and though I wasn’t 100% happy with some of my quilting designs I had “finish” on the brain and kept quilting even though I didn’t quite like how things were turning out.  When I spread the quilt out the other night to see what I still needed to do, those spots I hadn’t been sure about jumped out at me and I knew I wouldn’t be happy with them.  Don’t worry, it wasn’t a huge amount to unpick!  Just the bits I did in May.

2013-08-14Time away cleared the brain a little, and I came at the quilt with new ideas.  The straight lines behind the ship are a much better match to the rest of the quilting on the quilt than the swirly things I marked earlier.  Conversely the swirly bits I have now started quilting in the blue sky behind the lighthouse fit that space much better than the overpowering double diagonal lines I had started before. 

IMG_6154I’ll be making changes to what I had planned in the log cabin blocks too.  I had one block quilted with concentric circles and thought it was an original and interesting way to quilt a log cabin blocks.  Now that I’ve had a second look I don’t think it was such a great idea after all!  Just plain traditional outline quilting in the logs will work much better in this particular quilt.

At this point I think the quilt is a little less than half quilted but I have decided how to quilt most of the remaining parts. Those peaked column beside the lighthouse and ship are giving me trouble but I have finally decided to quilt everything else and see if inspiration eventually strikes.  On that note, I’m off to quilt!

Wednesday, August 7, 2013

Just needs the binding

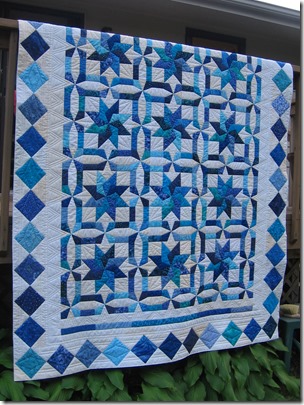
Kyoto Gardens is quilted! We’ve been eating out on the deck quite a bit this week as I had the sewing machine set up on the kitchen table to quilt. Happily the weather cooperated so I didn’t have to put everything away at every meal and lose too much momentum.  I was determined to get this done finally!
IMG_6714

I’ll be adding a scrappy blue binding to finish it but since it is a bit warm still to want a quilt sitting in my lap as I stitch the binding to the back, I’m not feeling a great sense of urgency.  In another month or so it will cool down enough in he evenings and I’ll get to it then.

I’m pleased with how the quilting turned out.  I spent a lot of time pondering how to quilt this, thinking it really needed some free motion quilting, then feeling a little disappointed when I conceded I wouldn’t manage that to my satisfaction.  I finally gave myself a good talking to and decided to “think outside the ditch”.  Even though I was quilting with the walking foot didn’t mean I was limited to stitching in the ditch. 

IMG_6713

At first I thought it would be much too awkward to wrestle the bulk of the quilt through the throat of the machine to pivot every time I reached a point.  I was right.  However, I figured out I could just end the stitching line and move along to another line heading in more or less the same direction so I didn’t have to pivot.  Then I stitched the next set of lines in another direction and so on until I had all the star points quilted without too much pivoting.

I didn’t cut my thread between lines so I didn’t have to stop and pull up the bottom thread every time I started and stopped.  I just switched to a really small stitch at the beginning and end of each segment then pulled the unbroken thread along to the next start point.  I just had to go snip the little thread “bridges” after I finished.
IMG_6712

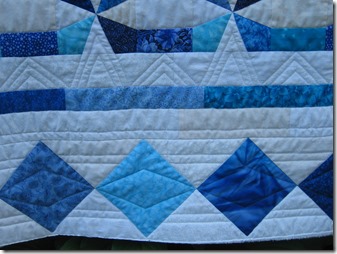
On the edges I was able to pivot at the tip of the triangles and still keep the bulk of the quilt out of the throat.  I originally planned just one echo for the triangles, but it didn’t look quite right so I took a deep breath and added another. It came out like I had wanted in the first place.IMG_6708
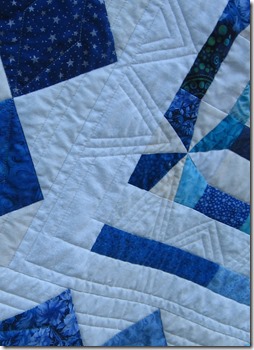


Rounding the corner in the inner border had me stumped for a bit.  The sides and the bottom/top borders are not the same width.  I lost count of how many awful ideas I drew before I came up with the very simple idea of extending that blue border  around the corner.  I think that worked quite well.  I’ll have to file that away for future use.
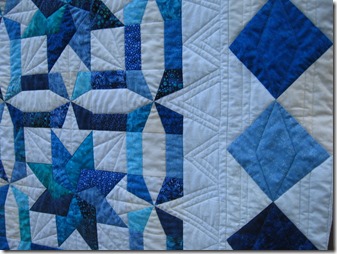


IMG_6717


Last night’s challenge was to figure out how many lines to quilt behind the blue squares and what to quilt in the squares.  I had though more lines but that was a bit overpowering.  I like this better.  It looks like the squares are mounted on a double rail.

In the squares I had thought of concentric squares but in the end opted for these diamonds that let me sew long continuous lines (with small pivots) instead of having to start and stop so much.  I chose them for the practicality but in the end I think they suit the quilt better than my first idea would have.

For anyone coming in late on this quilt project, the pattern is Kyoto Gardens from “Stellar Quilts” by Judy Martin.  I adapted the borders to better suit my style.  I think I’m going to name my version “Clear Skies”. I’ll let that sit for a while and see if it sticks.

Saturday, August 3, 2013

Writing patterns

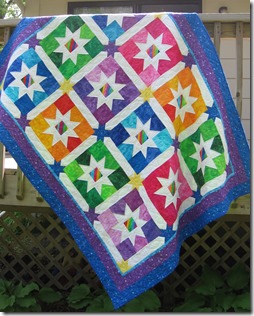
Jelly Bean Stars
Over the last couple of weeks I took a detour from sewing to write up a pattern for Jelly Bean Stars.  After much proofreading (thank you to my hubby for spotting the diagrams I had drawn backwards!) it is now available to purchase as a file download in my Craftsy shop. Payhip shop (updated Jan 12, 2015)

This is the sixth pattern I have written and yet again, the part that took me the longest was determining fabric requirements and deciding how to give instructions for cutting. I looked at other patterns for inspiration and tried to determine what I liked or didn’t like, or would like to see done differently.  I like the format I came up with but I’d like to pick your brains about what you like in a pattern, if I may.

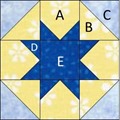
Test block 2 labelledFirst question: How do you feel about charts or tables?  My science background likes them.  Everything is neatly and concisely organized.  For example, for this block I like the table below.  For a block where I have to sub-cut units after the first cut, I might have two more columns, one to say how to sub-cut and one to list the total number of final units.

Patch
Size to cut
Number to cut
A – Yellow background
4 1/2” square
4
B – Yellow background
4 7/8” square
2
C – Light blue corner
4 7/8” square
2
D – Blue star point
2 1/2” square
8
E – Blue star center
4 1/2” square
1


Second question: Do you like knowing what each piece will be used for?  When I’m changing the colors in a quilt, I like an easy way to keep track of what’s what and not have to find that particular size patch in the piecing instructions to determine what it is so I can use the right color for my new color scheme.

Third question:  Just how much detail do I need to give?  Can I assume that if I say to cut 8 - 2 1/2” squares, you’ll know to cut a 2 1/2” strip, then cut 2 1/2” squares from that?  Or do I need to specify to cut the strip to that width first, then sub-cut squares, and so on?  Is that considered basic quilting knowledge?  In some cases I do find a cutting diagram useful, for example when I’m trying to squeeze a set number of various sized patches from a fat quarter and only one way will yield everything I need.

Last question:  How precise do you want fabric requirements to be?  I understand that fabric is not cheap and you might not want too much extra (or maybe you do so you can build up the stash!).  On the other hand if I find that exactly 9 inches of fabric is technically just wide enough, I tend to add 1/8 yard to that.  What if the 9 inches (a 1/4 yard cut) shrinks a bit, or isn’t quite straight?  Then that 1/4 yard isn’t quite enough anymore.  So how close do you think is too close?  Do you like a little fudge room (no more than 1/8 yard) in the recommended fabric requirements?  Rounding to the next 1/8 yard? More?  Less?

I’d appreciate any feed back you care to give me!

Now I will work on moving a few UFOs along instead of getting sidetracked by that star block I just drew as an example…though I think it could be made into a simple, easy baby quilt…though I don’t currently know anyone who needs one…but it would be sweet and simple…  And this is how the UFO’s start piling up!