Friday, September 15, 2023

Playing with Buds and Blooms

Buds and Blooms from Island Batik is a juicy new line of natural floral patterns delivering to stores this month.  Swan invited me to participate in an Instagram hop with other designers, mocking up existing patterns in this beautiful new collection.  I love the new look of these designs, so I thought I'd share here as well for those of you who aren't on Instagram.


Buds and Blooms from Island Batik, designed by Kathy Engle for Swan Amity Sheridan


I wish I had this actual fabric in my hands instead of just the digital swatches!  If I'm lucky, local shops have this on order and I can get my hands on some.  In any case, I did have fun uploading the digital swatches into EQ8 and recoloring designs.  I won't say how much time I spent coloring this, that and another possible mockups.  It's a bit addictive, but I managed to narrow down my choices to two designs.

With the hint of fall in the air, my first choice of project to recolor was Leafy Pathways.  I think I like this version even more than my original green version.


Leafy Pathways by Canuck Quilter Designs
Mocked up in Buds and Blooms


Of course, I had to recolor placemats too.  You know I have a thing about placemats :)  Here's Breadcrumbs (version 2).  I just love those rich prints!


Breadcrumbs by Canuck Quilter Designs
Mocked up in Buds and Blooms

If you'd like to make either of these projects as shown above, you can download this list of the specific fabrics used in each project.

If you are on Instagram, you have a chance to win a complete fat quarter bundle from Swan! Find my post here and jump from there to discover the other participating designers' posts.  Just follow the directions in the Instagram post and enjoy all of the beautiful quilts the lovely designers have mocked up for you!

I'm off to a guild retreat today and tomorrow.  I should have planned what to work on, but the date rather snuck up on me.  I'm doing well just getting my machine and tools packed up.  I'll throw a few UFO's in the car as well and hope they appeal to me when I get to the retreat.  If not, the hosting shop will be open for shopping, so I can browse to start something new.  I'll let you know how it goes!

Happy quilting,

Joanne

If you make a purchase in my Etsy shop after clicking through from the links in this post, Etsy will refund me a portion of the fees I pay for that transaction.  There is no additional cost to you.

Sunday, September 10, 2023

Star Chips: a jelly roll quilt and some ruler quilting

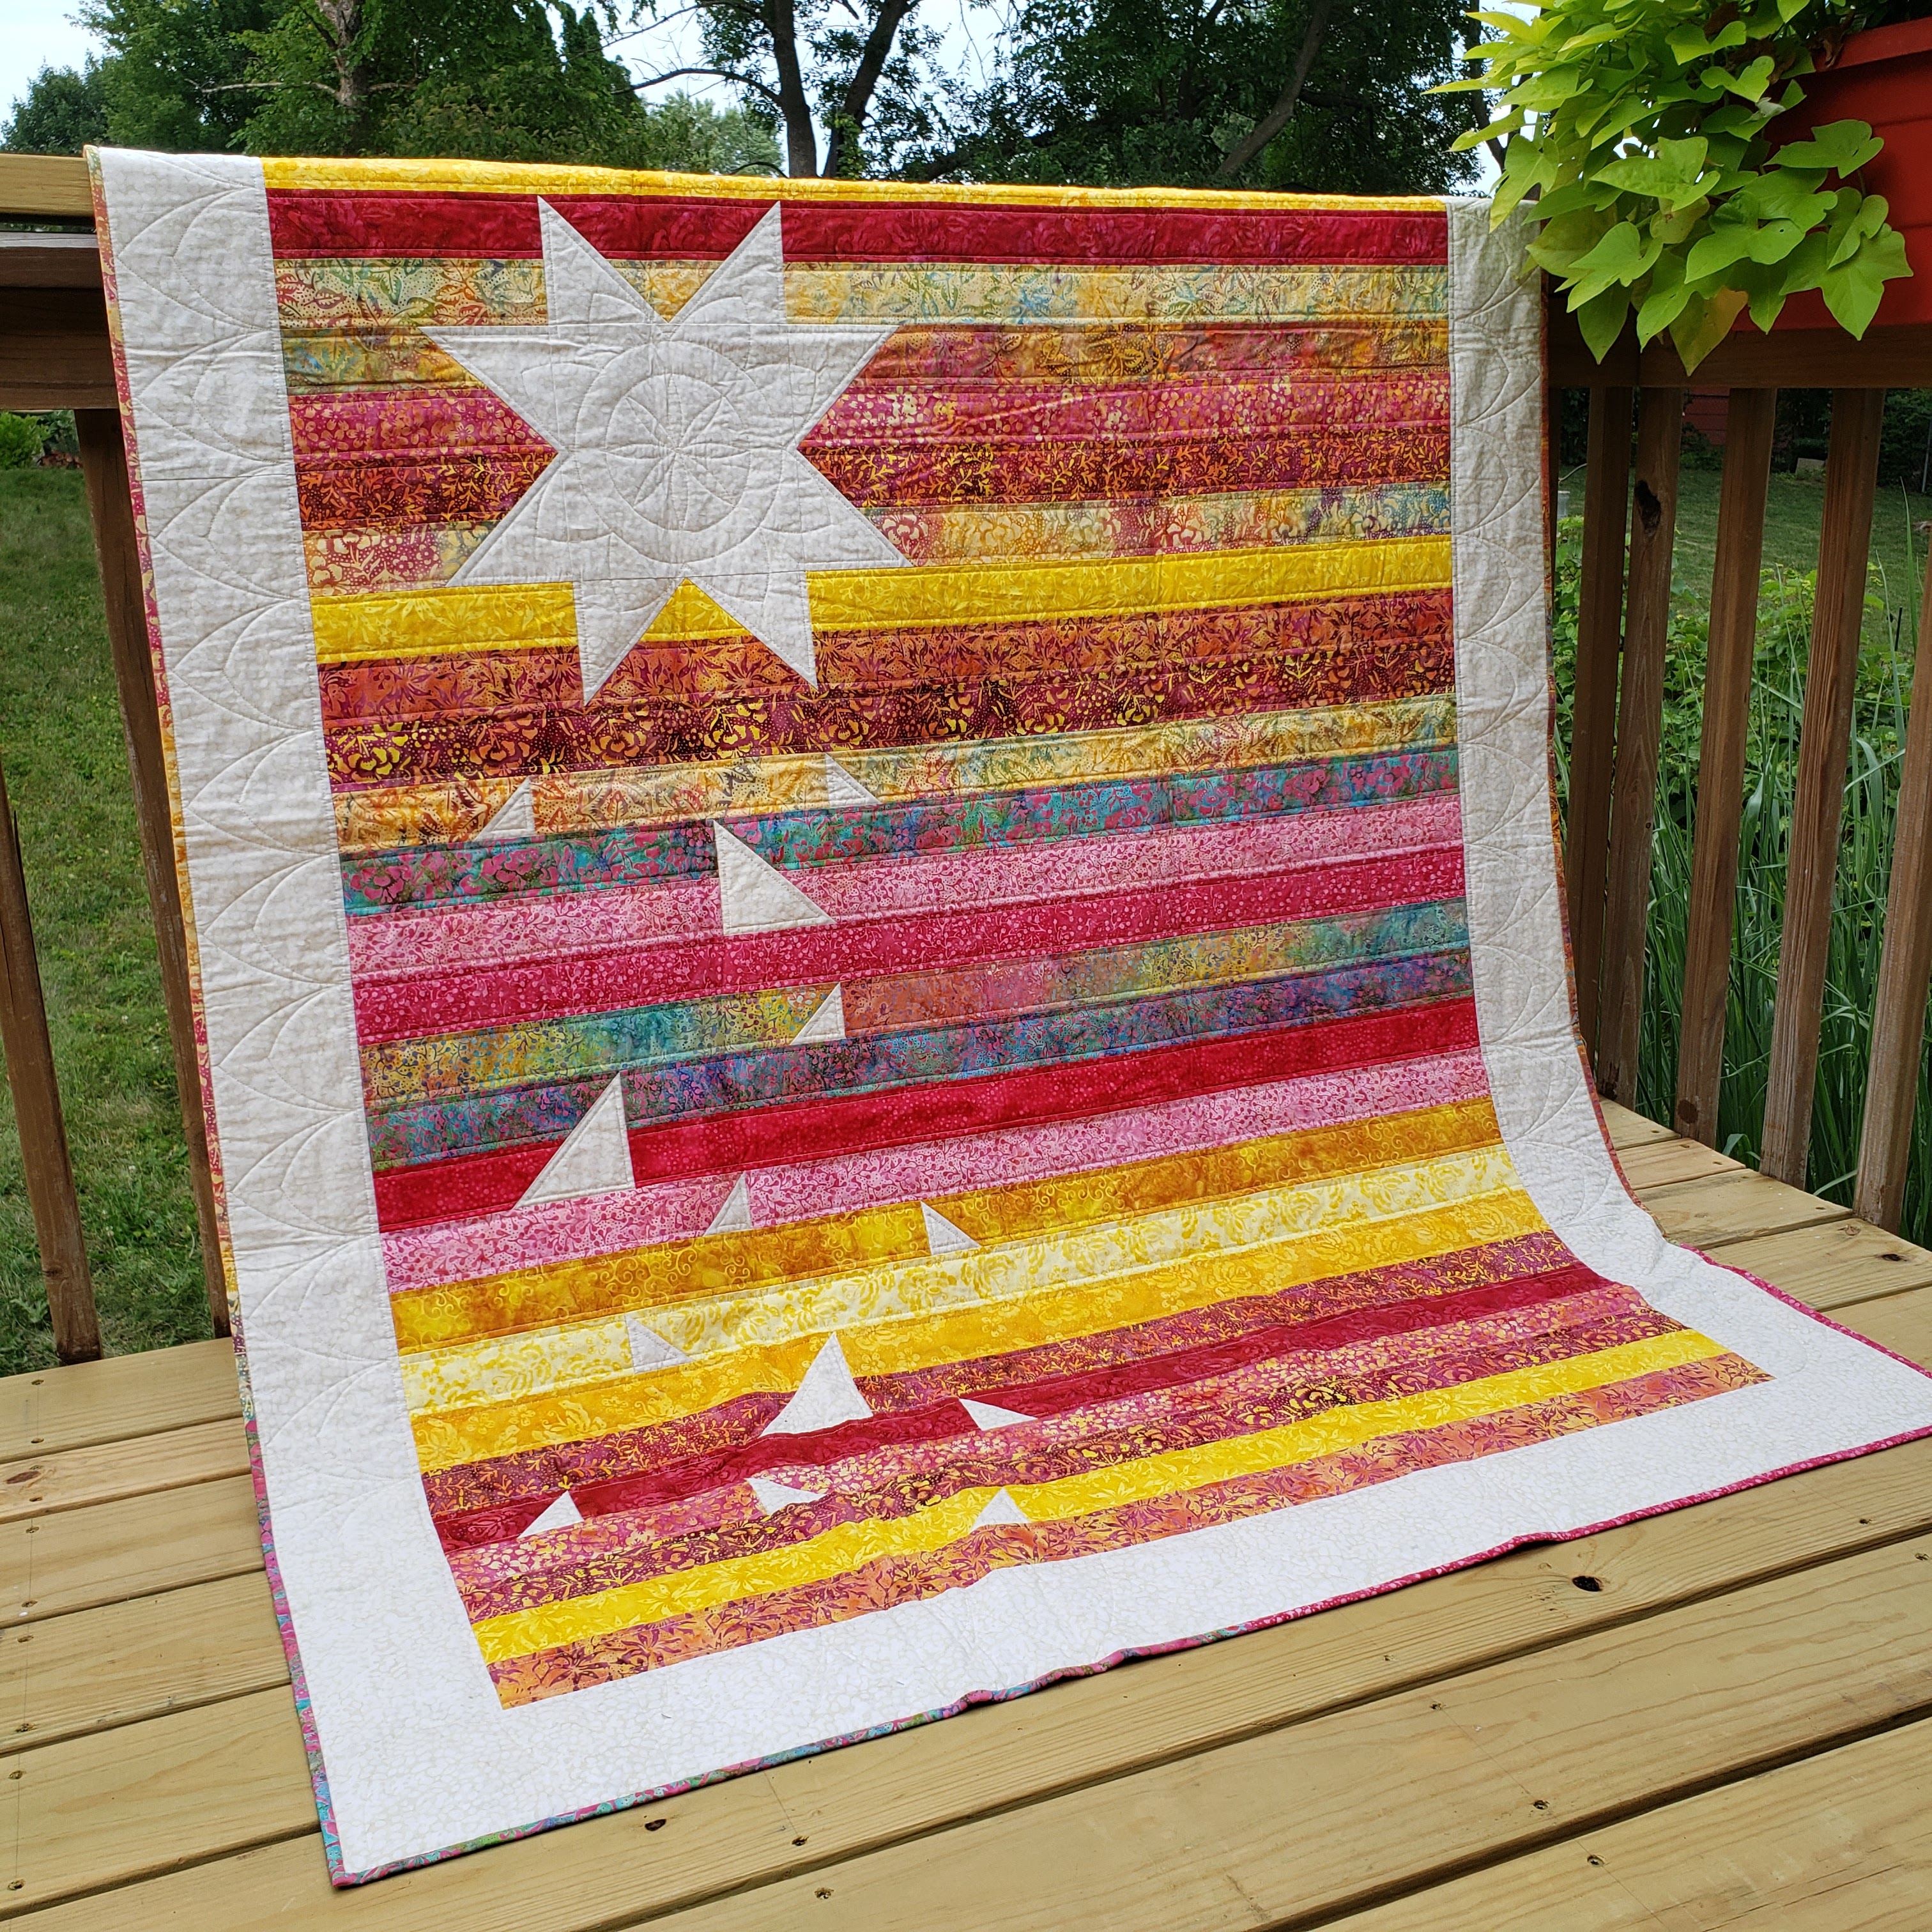
I made this last winter, and I'm finally able to share it with you, just in time for Sew a Jelly Roll Day next Saturday (September 16th).  It's a fun twist on a simple jelly roll strip quilt.

Star Chips by Canuck Quilter Designs
Fabric:  Blushing Garden from Island Batik

Star Chips is super easy to make.  The triangles are inserted with stitch-and-flip corners, no templates or applique required.  The quilt measures approximately 50" x 66".  The exact width depends on the length of the shortest strip in the strip pack.

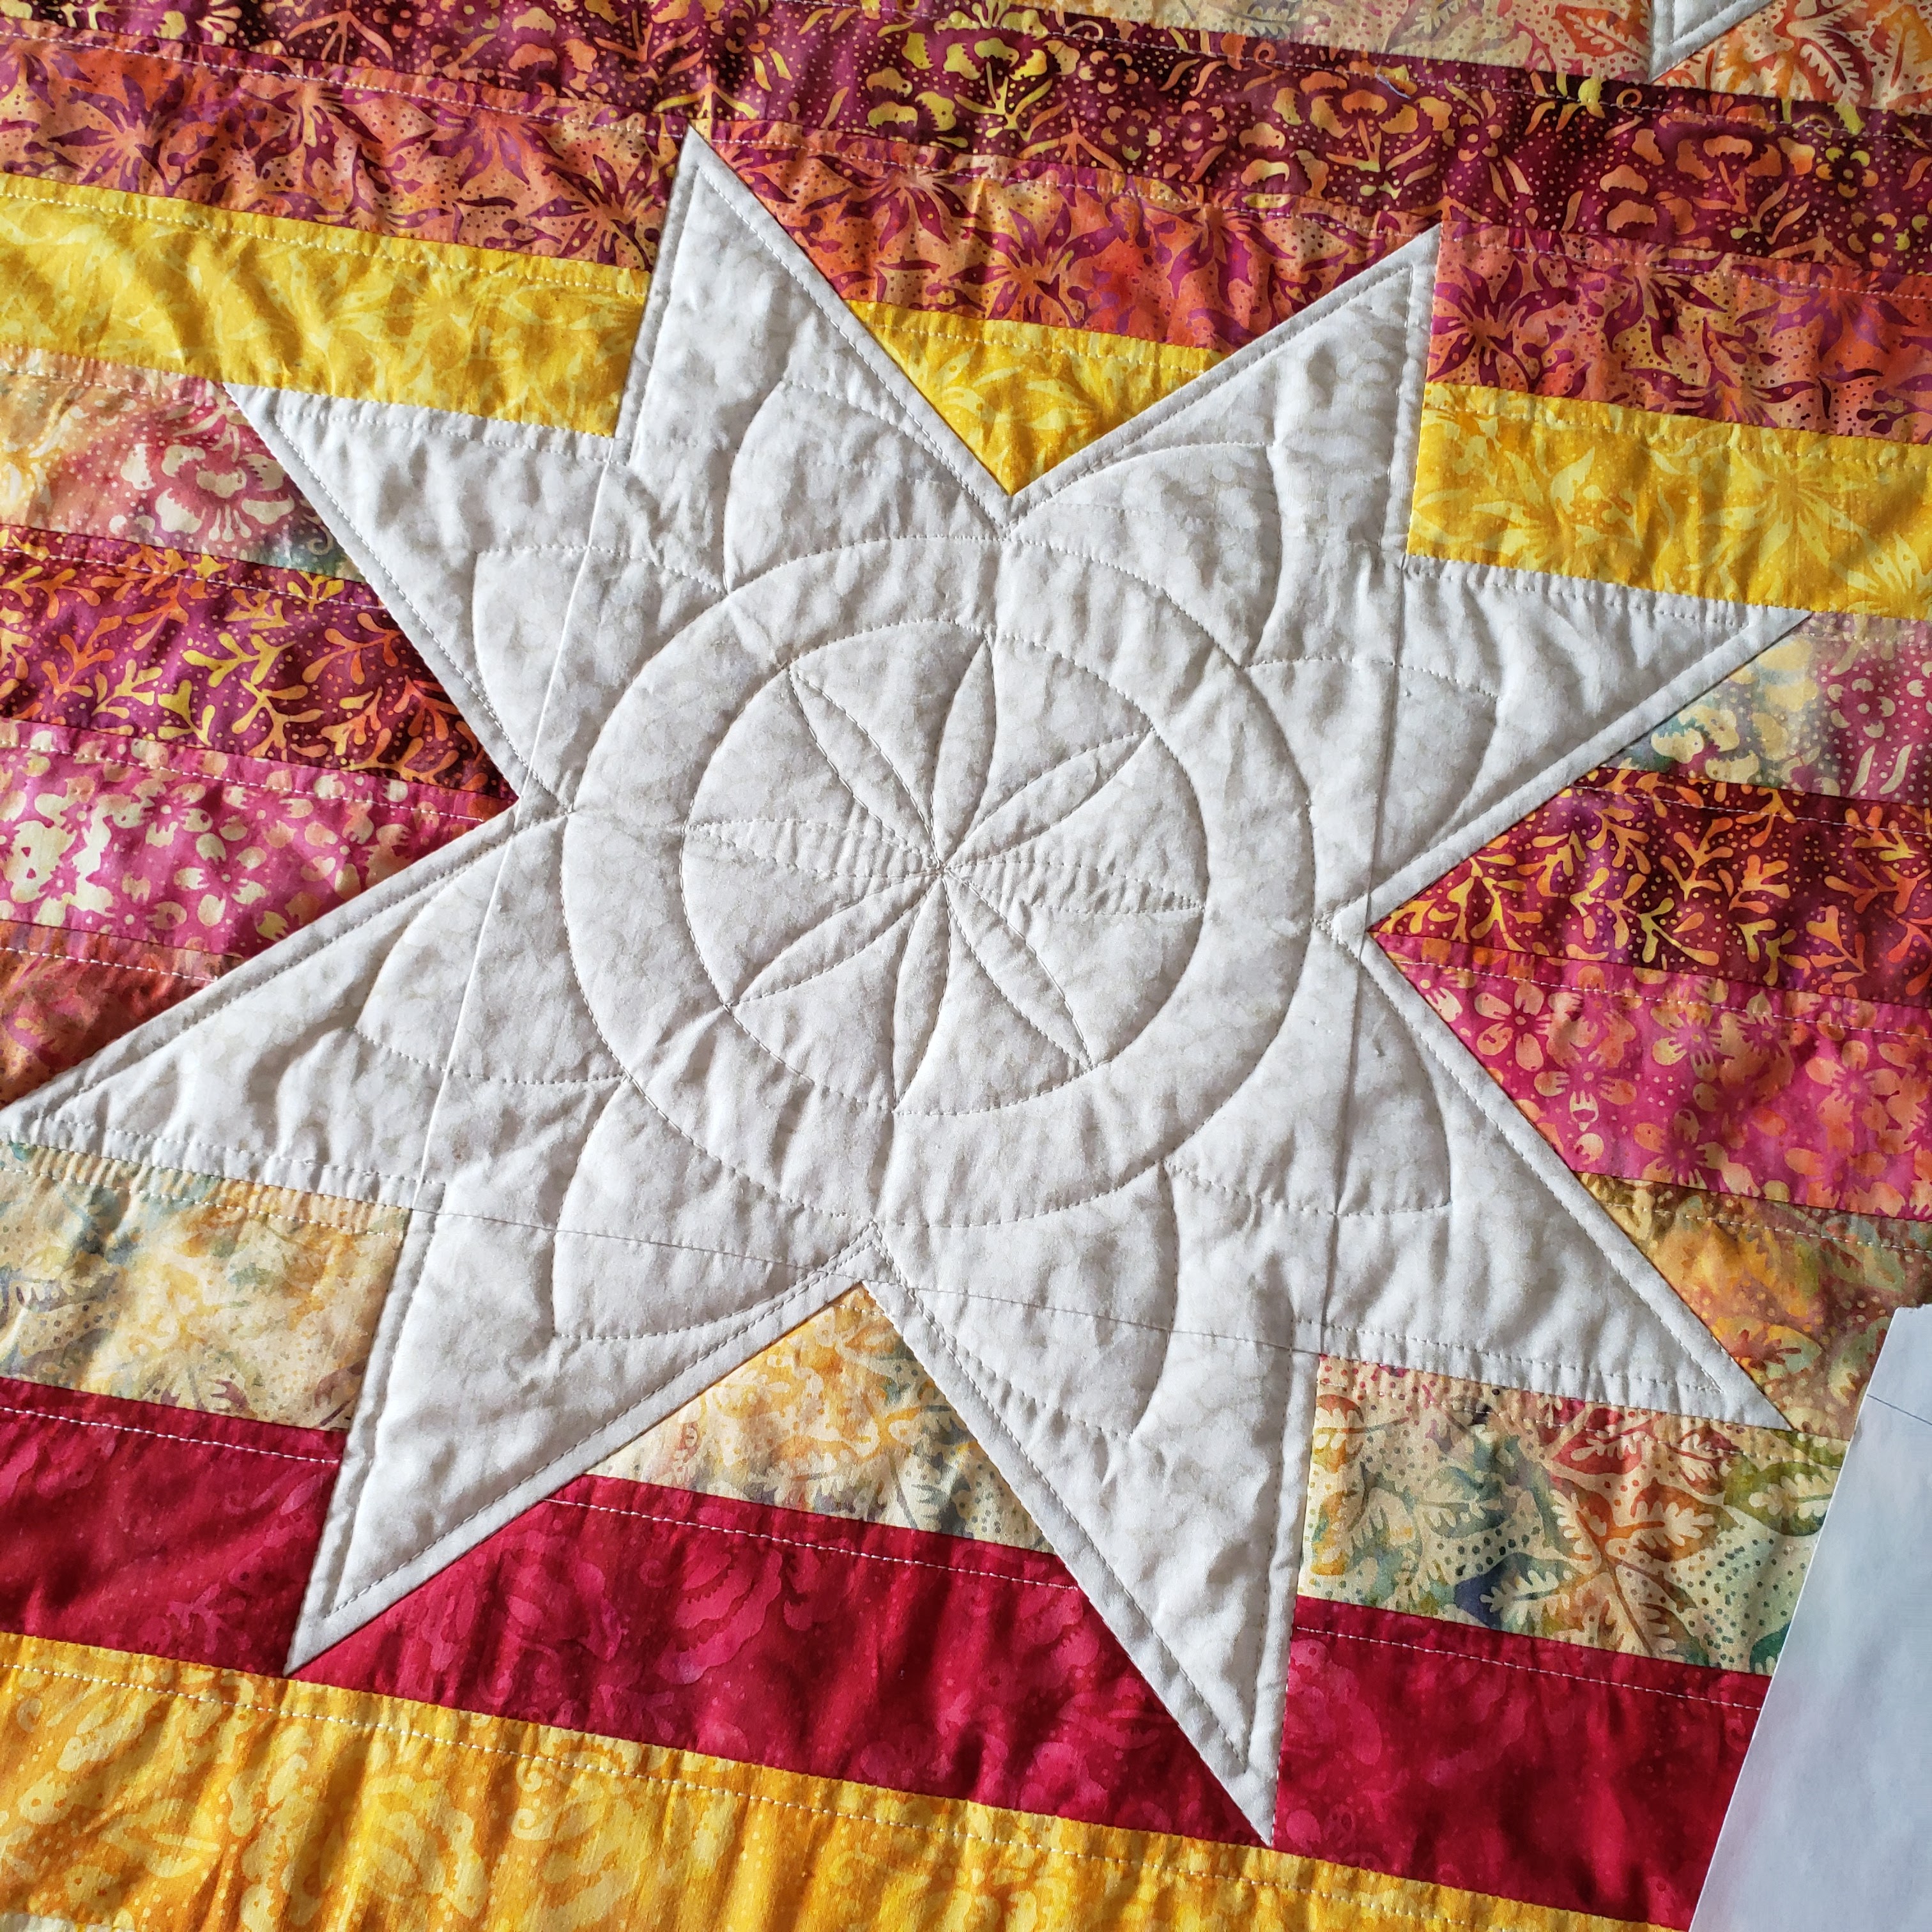
As usual, my biggest challenge was deciding how to quilt this.  I'm not very skilled at quilting all-over freemotion designs, so I settled on quilting 1/4" on either side of each seam between the strips, but thought I could do some custom quilting in the stars and in the borders.  I started with the stars, sketching ideas on paper, then pulling out the quilting rulers and stitching line discs to draw it out full scale on paper as I would quilt it.

Planning custom ruler quilting

I start by drawing the patchwork elements to size, then fill in my proposed design.  The stitching discs let me draw where the stitching would be if I was sewing with a ruler foot tucked up against the quilting ruler/template.

The design above looked like it would work, so I marked the quilt with all the appropriate registration lines to help me place all the stitching in the right places and stitched away.  I had words with my machine when it refused to stitch in a particular direction. (This is a new problem that a trip to the machine spa did not correct, but let's not get sidetracked.)  I ended up having to turn the quilt more than I should have to when freemotion/ruler quilting, but I made it work.

Custom ruler quilting in the star

This was stitched with my Westalee rulers.  I used the straight edge of the 12" arc, as well as circles-on-quilts and the 6"spiral template.  

I used a blue water-soluble pen to mark the quilt before quilting, and a water brush to erase them afterwards.  I don't know what brand this brush is.  It has a refillable barrel for water.  You just squeeze gently to push water drops down the brush as you paint water over the lines to erase. It's a bit less messy than having to spray the whole surface to get the markings out.

Erasing water-soluble registration marks with a water brush

I had planned to quilt walking foot cables in the borders, as I did in my Starlit Picnic quilt, but that looked denser than the quilting on the rest of the quilt.  I try to keep the quilting density more or less even across all areas of a quilt to avoid bunching and waving.  I slept on it, then revisited the border quilting I did on Topiaries.  I had to adjust the scale a little, but the strips acted as perfect spacers to help distribute the arcs.  This was quilted in two passes around the quilt using the 6" spiral template.

Detail of quilting in the border of Star Chips

I have since been told this resembles the Star Trek symbol.  What do you know?  It does, and now I can't unsee it, but I still like how it looks on the quilt!

Here's how I handled the border design in the corners.  

Detail of corner border quilting in Star Chips

You see more of the pieced binding below.  The quilt center only used 28 strips, so I used the extra strips in the strip pack to piece a scrappy binding.  It added interest to the binding, used more of the strip pack and saved me having to get extra fabric for the binding.  Win, win and win.

Scrappy binding on Star Chips

Star Chips by Canuck Quilter in Blushing Garden from Island Batik

That's all I have to share about Star Chips. 

Now I'm heading to the ironing board to press some backing for the Accidental Quilt.  I've been ready to quilt it for the last month, but have been away from the a sewing room as I travelled to BC to help my daughter get settled in Vancouver (she's starting a nursing program at UBC), then visited parents and brother and sister-in-law in Victoria, then came home and proceeded to be sick for a week and half.  I'm finally getting a a bit of energy back, and I really, really want to see if my walking foot quilting plan for this quilt pans out!  I'll let you know.

Happy quilting,
Joanne

The Star Chips pattern is available as a PDF download in my Etsy shop, or you can ask for a print version at your favourite quilt shop.

Thursday, September 7, 2023

Matching stripes in binding

How do you feel about striped binding?  I think it adds a fun touch to some quilts, providing I can find just the right stripe.  It takes only a little more work to match the stripes at the seams if that's something that concerns you.  Here's how I matched the stripes on the binding for the Chef's Kiss placemats and runner I shared last weekend.

Matched stripes on diagonal seams.

I usually join binding strips with a diagonal seam to distribute the bulk of the seam.  When the strips are folded in half, then sewn onto and folded over the edge of the quilt, a straight seam would result in 12 layers of fabric stacked together at the seam.  That's not ideal!

Here's how I matched the stripes on a diagonal seam.

1. I made sure the ends of the strips were straight and square.


2.  With the strip wrong side up I folded the end of one strips at a 45 degree angle as shown below, bringing the end down to match the lower edge of the strip, and pressed the fold flat.


3. Using a washable glue stick, I applied a thin line of glue right beside the fold.


4. With both strips right side up, I slid the folded end of the folded strip over the other strip until the stripes were aligned.  I carefully finger pressed the fold to the bottom strip, checking that the stripes stayed aligned before pressing with a hot iron.  The strips were now glued together along the fold.


4.  Moving to the sewing machine, I unfolded the top strip and sewed in the crease from the fold.


5. I trimmed away excess fabric1/4" beyond the seam.  I suggest folding the strip back to check the seam from the right side of the fabric, making sure the stripes are matched as expected before trimming.


6. I pressed the seam open to complete the join.  Because I used a thin line of glue, I was able to pull apart the seam allowances easily to press the seam open.


I think it was a pretty good match.  Here's how it looked on my placemats.


Overall, it worked well, but I must point out that despite the effort it isn't possible to completely avoid a mismatched stripe.  You can't control how the stripes will match when you join the binding ends after sewing the binding to your quilt.  How the stripes meet is determined by the perimeter of the quilt and the size of the stripe design repeat.   In the picture below I circled one seam with the stripes matched, and a random join from joining binding ends.


I'm still happy to do the work to make the stripes match in as many places as possible.  Sometimes even that final join matches up out of pure luck, like it did on 3 of my 4 placemats!

For tips on joining diagonal stripes, see this post .

I hope you find this useful.  Let me know if you use these tips, and please share any insights you have about making and using striped binding.

Happy quilting,

Joanne